Sunday sketch #255

I love the look of skinny strips in quilt piecing. A few quilters have used this technique to great effect recently – Steph Skardal has done a bunch of stuff with straight strips, while Jenny Haynes (also known as Papper Sax Sten) has mastered curvy strips. (I’m hoping to take one of Jenny’s workshops soon!) And lately I’ve discovered Sarah Bond using angled strips to create elongated triangles and diamonds. Sarah’s been running workshops on her technique recently: check out #precisionpieceddiamonds on Instagram. (As much as I love seeing quilt teachers’ own work, it’s even better seeing the amazing variety in their students’ work – which I also think is a sure sign of a good teacher.)

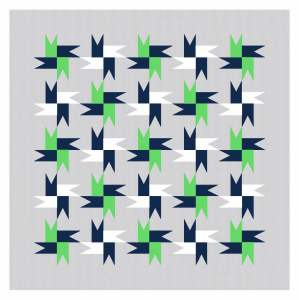
Anyway… I was playing with long strips recently, and created this week’s diamond-y designs. I didn’t set out to recreate Sarah’s approach, but given the similarities, I just had to reference her work.

In my case, I’ve overlapped the large diamond shapes, which creates smaller secondary diamonds. They can be coloured in differently for effect, or left ‘blank’.

Even with a limited palette, there are plenty of combinations and permutations of colour – for the strips themselves and the shapes they enclose.

But sometimes simple is best.

I’ve never actually sewn with skinny strips – I kinda assume I wouldn’t get them as straight or precise as I’d like (and even the slightest smidge of wonkiness would drive me nuts). But I think the best way to do these would be using paper piecing. If you’re interested, you should check out workshops and tutorials from Sarah Bond, Jenny Haynes and Steph Skardal!

Sunday sketch #254

Recognise the pinwheel flags from last week? Here’s where they started.

I’ve been playing with elongated curves lately. I was prompted by the oval drunkard’s path templates from Jenny Haynes / Papper, Sax, Sten, which I got awhile back. They’re 2:1 curves, so twice as high as they are wide (standard drunkard’s path blocks are 1:1 – the same width and height).

I wasn’t sure how to make 2:1 curves in Electric Quilt, but I figured out that you can draw a standard curve, then select it and drag it the box around it to create new dimensions. I’m not sure I got the dimensions quite right in this design, but I got sidetracked by the concept of using curves in this way. It’s a concept I’ve tried a few times recently – you might’ve seen Sunday sketch #251, and I’ll post some other designs like this in the future.

Anyway – alternating blocks help to introduce a bit of negative space, so the whole design doesn’t feel too crowded.

The great thing about a four-colour palette is how many combinations are possible. Here are a few.

It gives a slightly different feel to the design if you switch the order of the alternating blocks, so that the curved blocks are in the corners.

I used sashing between the blocks, so it’s possible to use all curved blocks throughout the design without making it feel too crowded…

…but I still prefer the alternating arrangement of curved and non-curved blocks.

I love the oval drunkard’s path shape! It lends a bit of wonkiness and an informal feel to the overall design. I’m looking forward to trying out the Papper, Sax, Sten templates and coming up with more curvy designs. This one could be made using the templates, triangle-in-a-square units, and squares.


Sunday sketch #253

I’m posting a little out of order this week. If you’ve been following for awhile, you know that one sketch will often spark an idea for a second sketch, which will morph into a third sketch, which can lead off in another direction to a fourth sketch… and so on. When this happens, I usually post the designs in order of creation, so I can easily tell the story of how they evolved. But not this week.

You’ll see this ‘pinwheel flag’ motif (for lack of a better description) in an upcoming sketch, where it first started. But I like the simplicity of this variation, so I’m posting it first.

I tried to inject a bit of bright colour into this one, because my default palette with this dark blue is often white and grey….

In the variations above, there are secondary squares created by the closest quadrants of four adjacent blocks… so four white ‘flags’ create a white square, and four blue flags create a blue square.

But the flag colours can be mixed up to avoid creating those squares. I like to create designs that offer choices for colour placement, particularly with a limited palette.

I’ll do a bit more with this block next week. But in the meantime, here’s another variation, created by colouring in the secondary squares with the alternating colour. I also flipped the orientation of this one, to avoid potential problems.

I like how these two versions look almost chaotic and improv-y but are actually very controlled and rule-based.

All these designs could be made into quilts using a triangle-in-a-square block and squares. That’s it!