Tagged: skinny strips
Sunday sketch #381
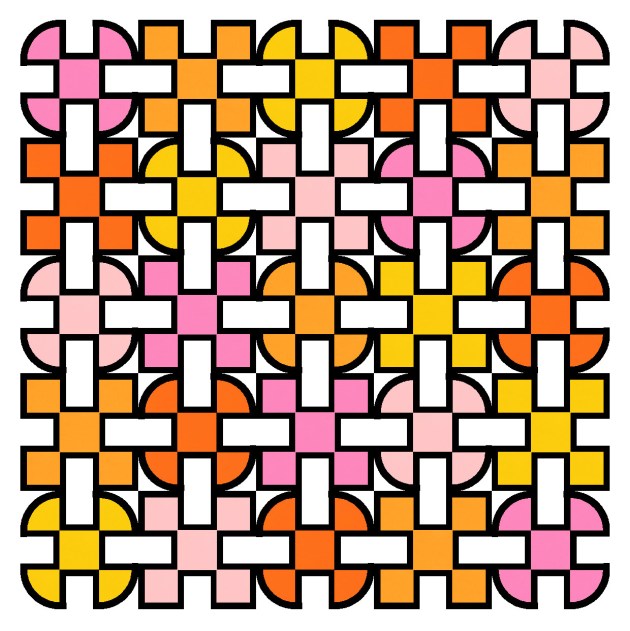
One of the things I’ve always loved about my Sunday sketches are the outlines – the thin black lines around the shapes. When I used to hand-draw all my sketches, they were all lines; now that I create most of my designs in EQ8, I don’t always show them. But sometimes I purposely make the black lines a feature (see Sunday sketches #265, #269, #277 and #348, for example), even though I’ve never really made a quilt with skinny strips (apart from Sketch).
Anyway, this week’s sketches are the by-product of a sketch that I haven’t shared yet. You’ll see the connection in the coming weeks, but for now, it’s fine as a standalone design.
And yes, I’ve done my usual sudoku-style colouring where each colour appears only once in each row or column 🙂
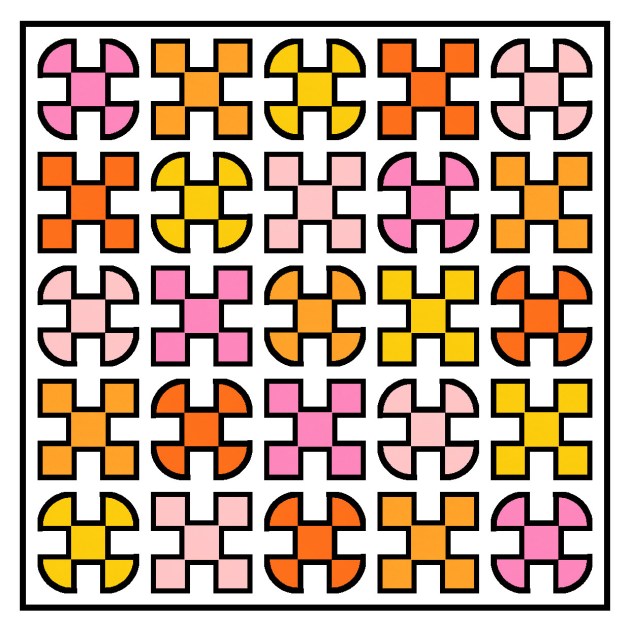
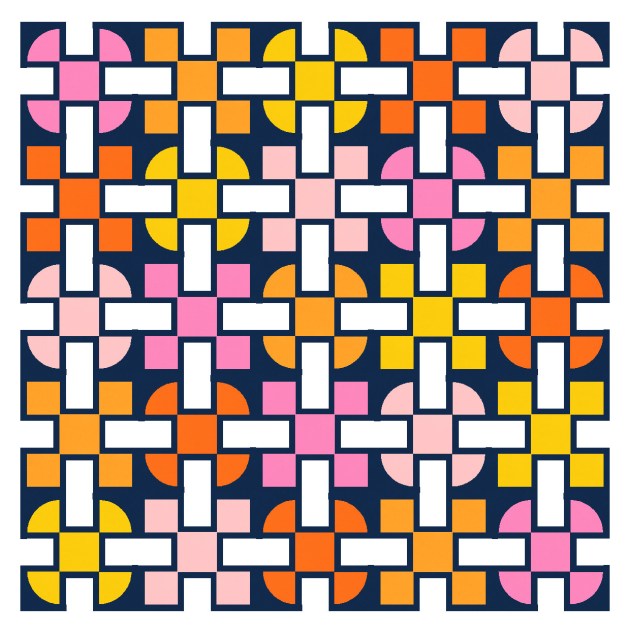
This is a block-based design using a standard layout, plus thin sashing. I used black to delineate the shapes in the first version, but colouring the same lines in the background colour means I can highlight some of the secondary shapes – those light grey rectangles. They definitely feel like they’re in the foreground, overlapping and connecting the coloured circles and squares.

Here’s a reverse colourway where the shape outlines are still the same colour as the background, and the connecting rectangles are in white instead.
There is thin sashing between the blocks, just to give a smidge of space between them. Here’s what happens without the sashing – this is just a bit too crowded for me!
And the same design works without any outlines. Here I’ve coloured each block’s outlines in the same colour as the rest of the main shape(s). That just makes the shapes look a little fatter. I quite like the connectivity in this one too.

This week’s sketches could be made using thin strips, squares, rectangles and quarter-circles (or drunkard’s path units).
I feel like there may be the potential to iterate this design a little more, but first I need to show you the designs that led to this one! That’s next week.
Sunday sketch #313
We’re having a chilly winter in Melbourne this year, so I’m already dreaming of spring! This week’s sketch is also a good excuse to use my happy palette of warm yellows, pinks and oranges.

These cute flower blocks are offset by a half-block in each row, which elongates each flower ‘stem’ by extending it into the space between the two blocks beneath.
In the first version, I’ve used the same colouring for all the upper and lower ‘leaves’ in the blocks, with different colours for the flowers. But of course, the leaves can have a mix of colours too.

That’s a bit busy for my liking; here’s a version with all the blocks coloured in the same way. I’m not sure if it’s the limited palette or the darker greens that really help to highlight the repetition in those skinny curves and vertical lines.

Then I tweaked the design of the flowers themselves – this next design’s a bit more like a tulip, I think. This variation also creates a lovely diagonal movement from top left to bottom right, thanks to those new teardrop-shaped red ‘petals’.

This week’s sketch would be tricky, but not impossible, to translate into an actual quilt. It would take a combination of half-square triangles, drunkard’s path blocks, and skinny curved inset strips.
Sunday sketch #270
More skinny strips this week, but straight this time.

Believe it or not, this design is made from a single block in a 4×4 layout. And each block is a 4×4 arrangement of squares that are separated by thin sashing. Depending on how the background and sashing are coloured (or not), different parts come to the foreground or move to the background. Here’s the reverse colourway.

I actually started with black sashing and two colours. I worked through the shapes, colouring as I went, making sure that adjacent shapes never had the same colour. In some places I had to move the sashing or change the shapes to get the desired effect. (Oops, I can see one spot where two white shapes are touching sides.)

The black lines are a bit Mondrian-ish, of course, which is why I changed them up a bit.
This design could be made into a quilt using normal piecing of squares, rectangles and thin strips. And the layout possibilities are endless!
