Try, try again

I’d love to pretend that I’ve been too busy quilting over the past 4 months to blog frequently, but in reality, a combination of distraction, self-doubt and procrastination has hindered my progress. Analysis paralysis, in a nutshell.

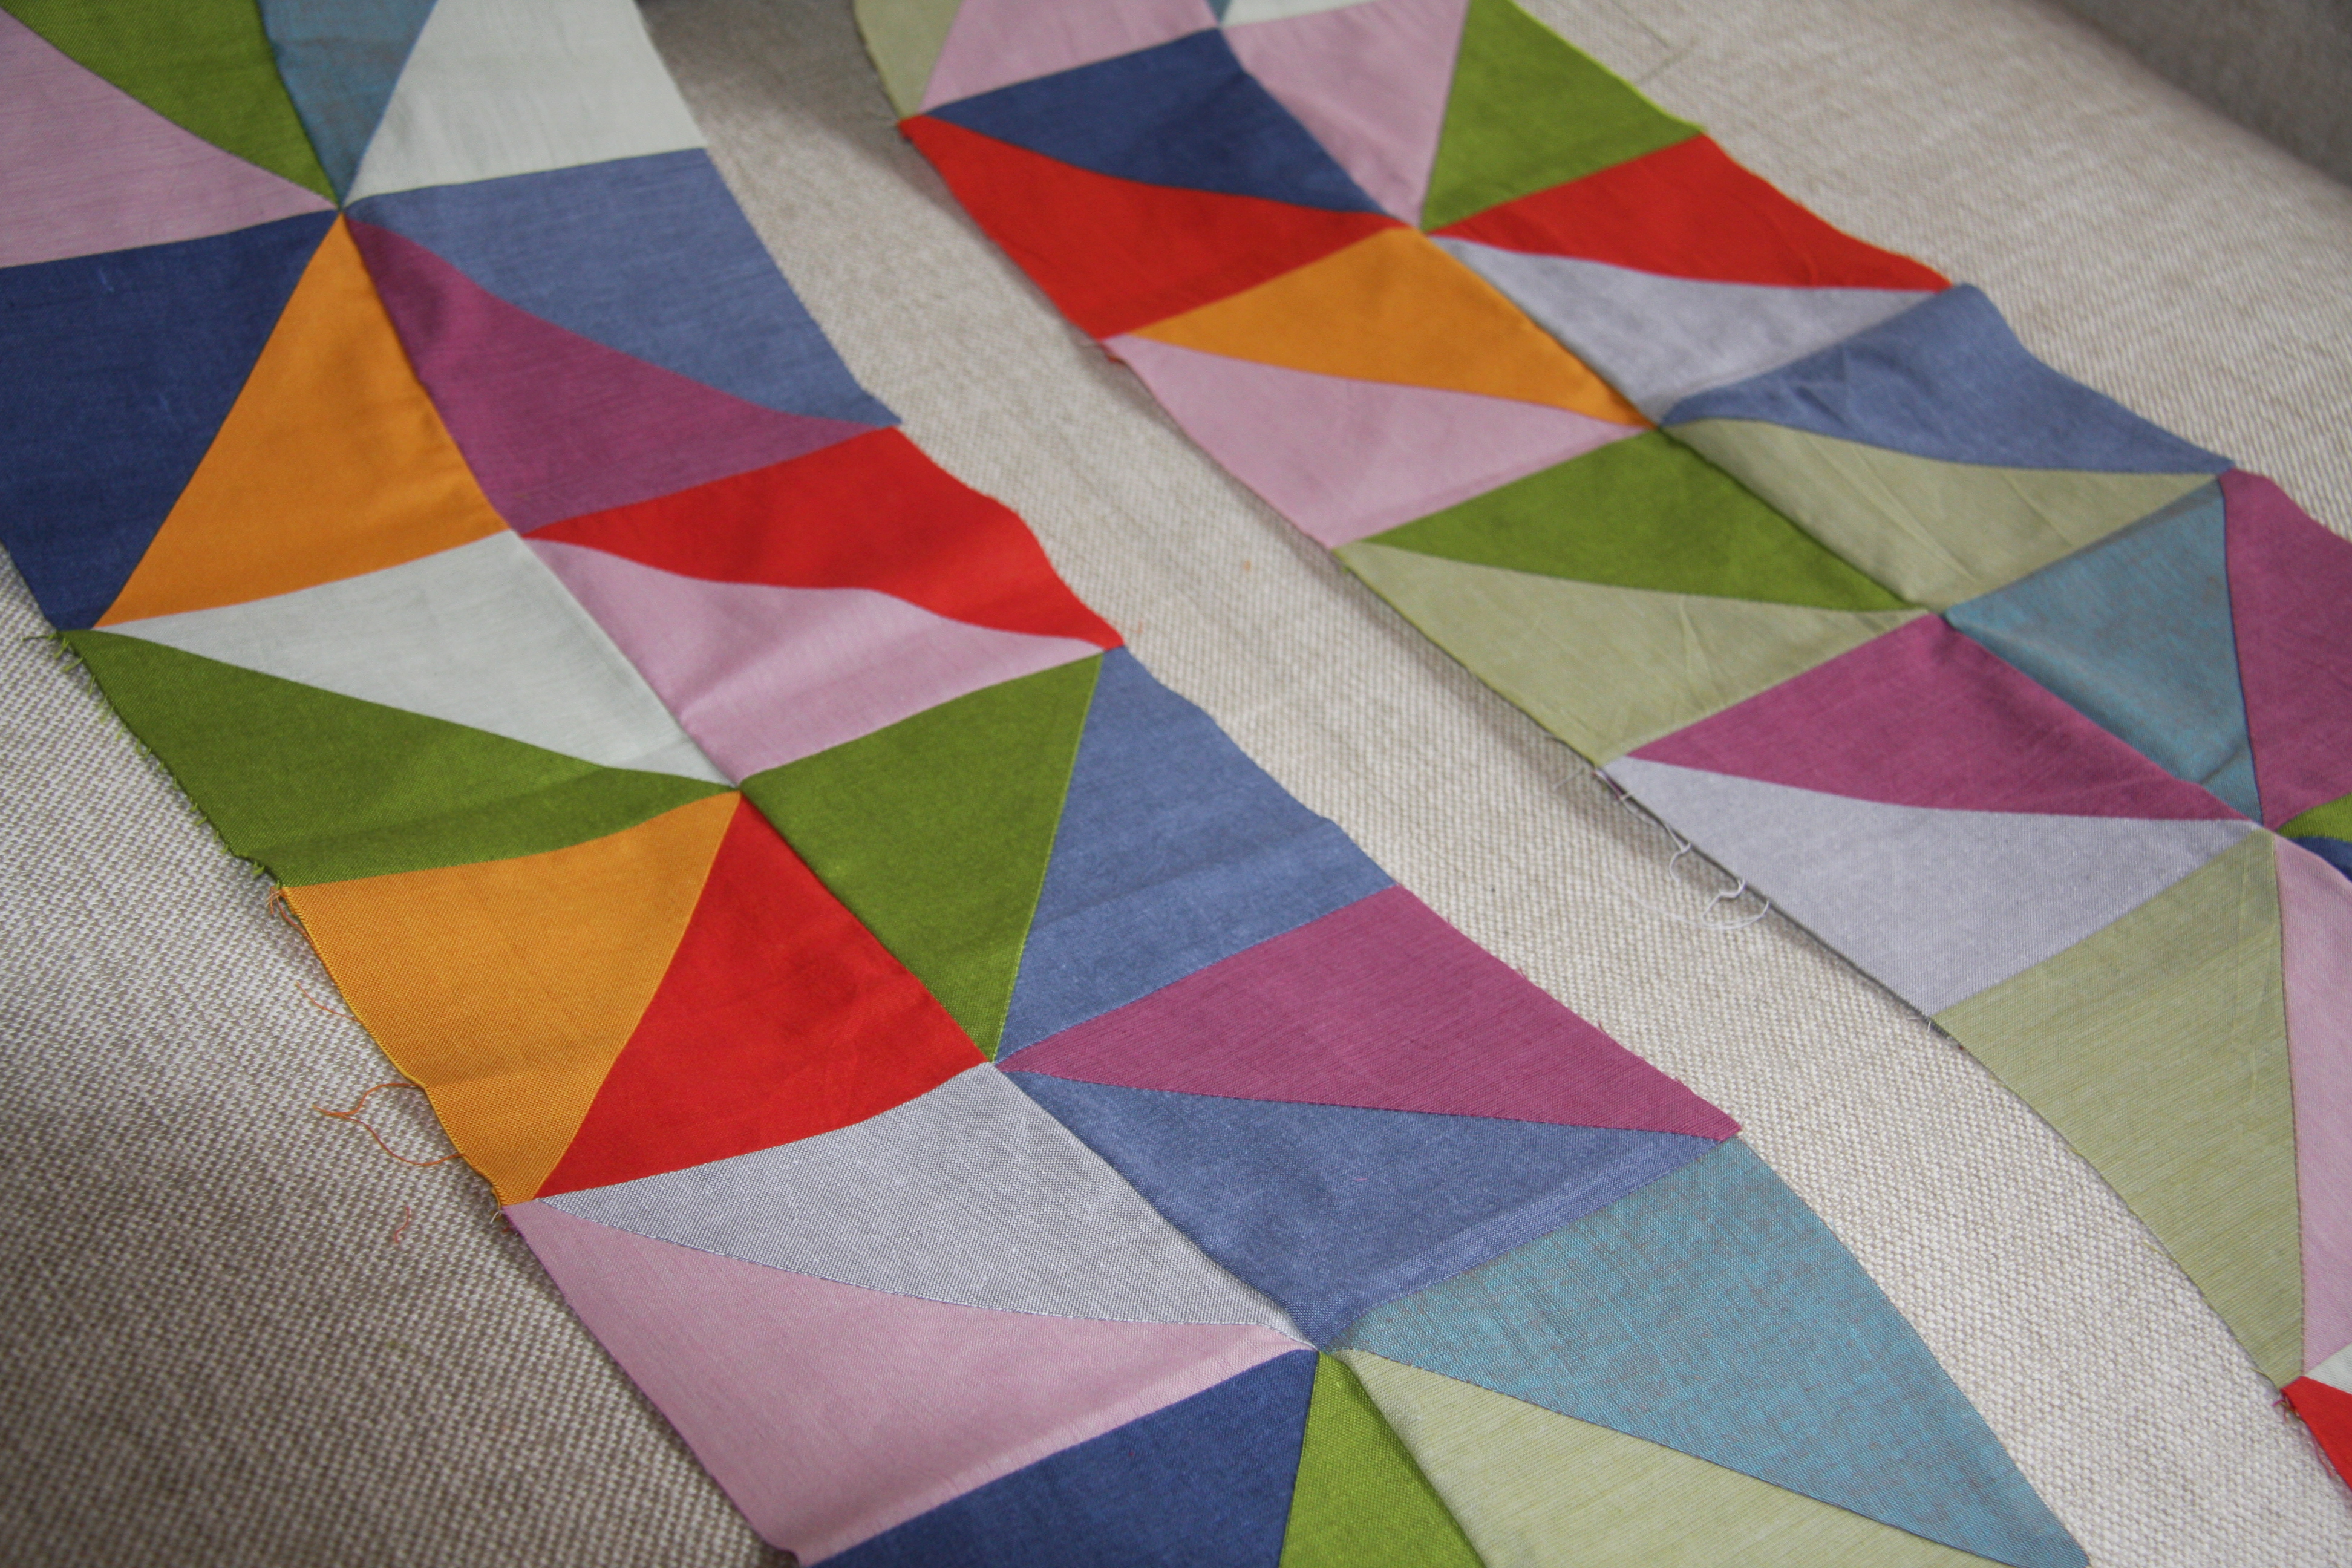
I’ve finished the half-square triangle quilt top, but that project is resting for a few reasons:

1. I didn’t know what to do for the backing, which is too wide (48″) to use a normal-width fabric (42-44″).

2. After deciding not to do anything fancy, but just run a vertical seam down the middle, I ended up buying backing fabric, but not enough. When I went back to the fabric store, they’d run out. Rookie mistake! I ended up ordering online — CherryBFabrics (via Etsy) had charcoal grey peppered cotton in stock. Yay!

3. I wanted to redo some of the points on the quilt top, since my corner-matching was woeful (to say the least). A few dozen corrections later, and it’s still not much better than it was. Failure’s hard! But I found awesome tips online that I’m going to try next time — using positioning pins and basting stitches. Why didn’t I think of that?!

4. I didn’t iron the seams well on the quilt top, so they’re facing all different directions and some joins are quite bulky in places. I’m not sure how to quilt around them. So I wait… and wait… hoping the answer will come to me in a dream. (It hasn’t.)

5. There’s nowhere in the house to take a nice picture of the whole quilt top!

So instead of trying to figure any of that out, I started on a new quilt.

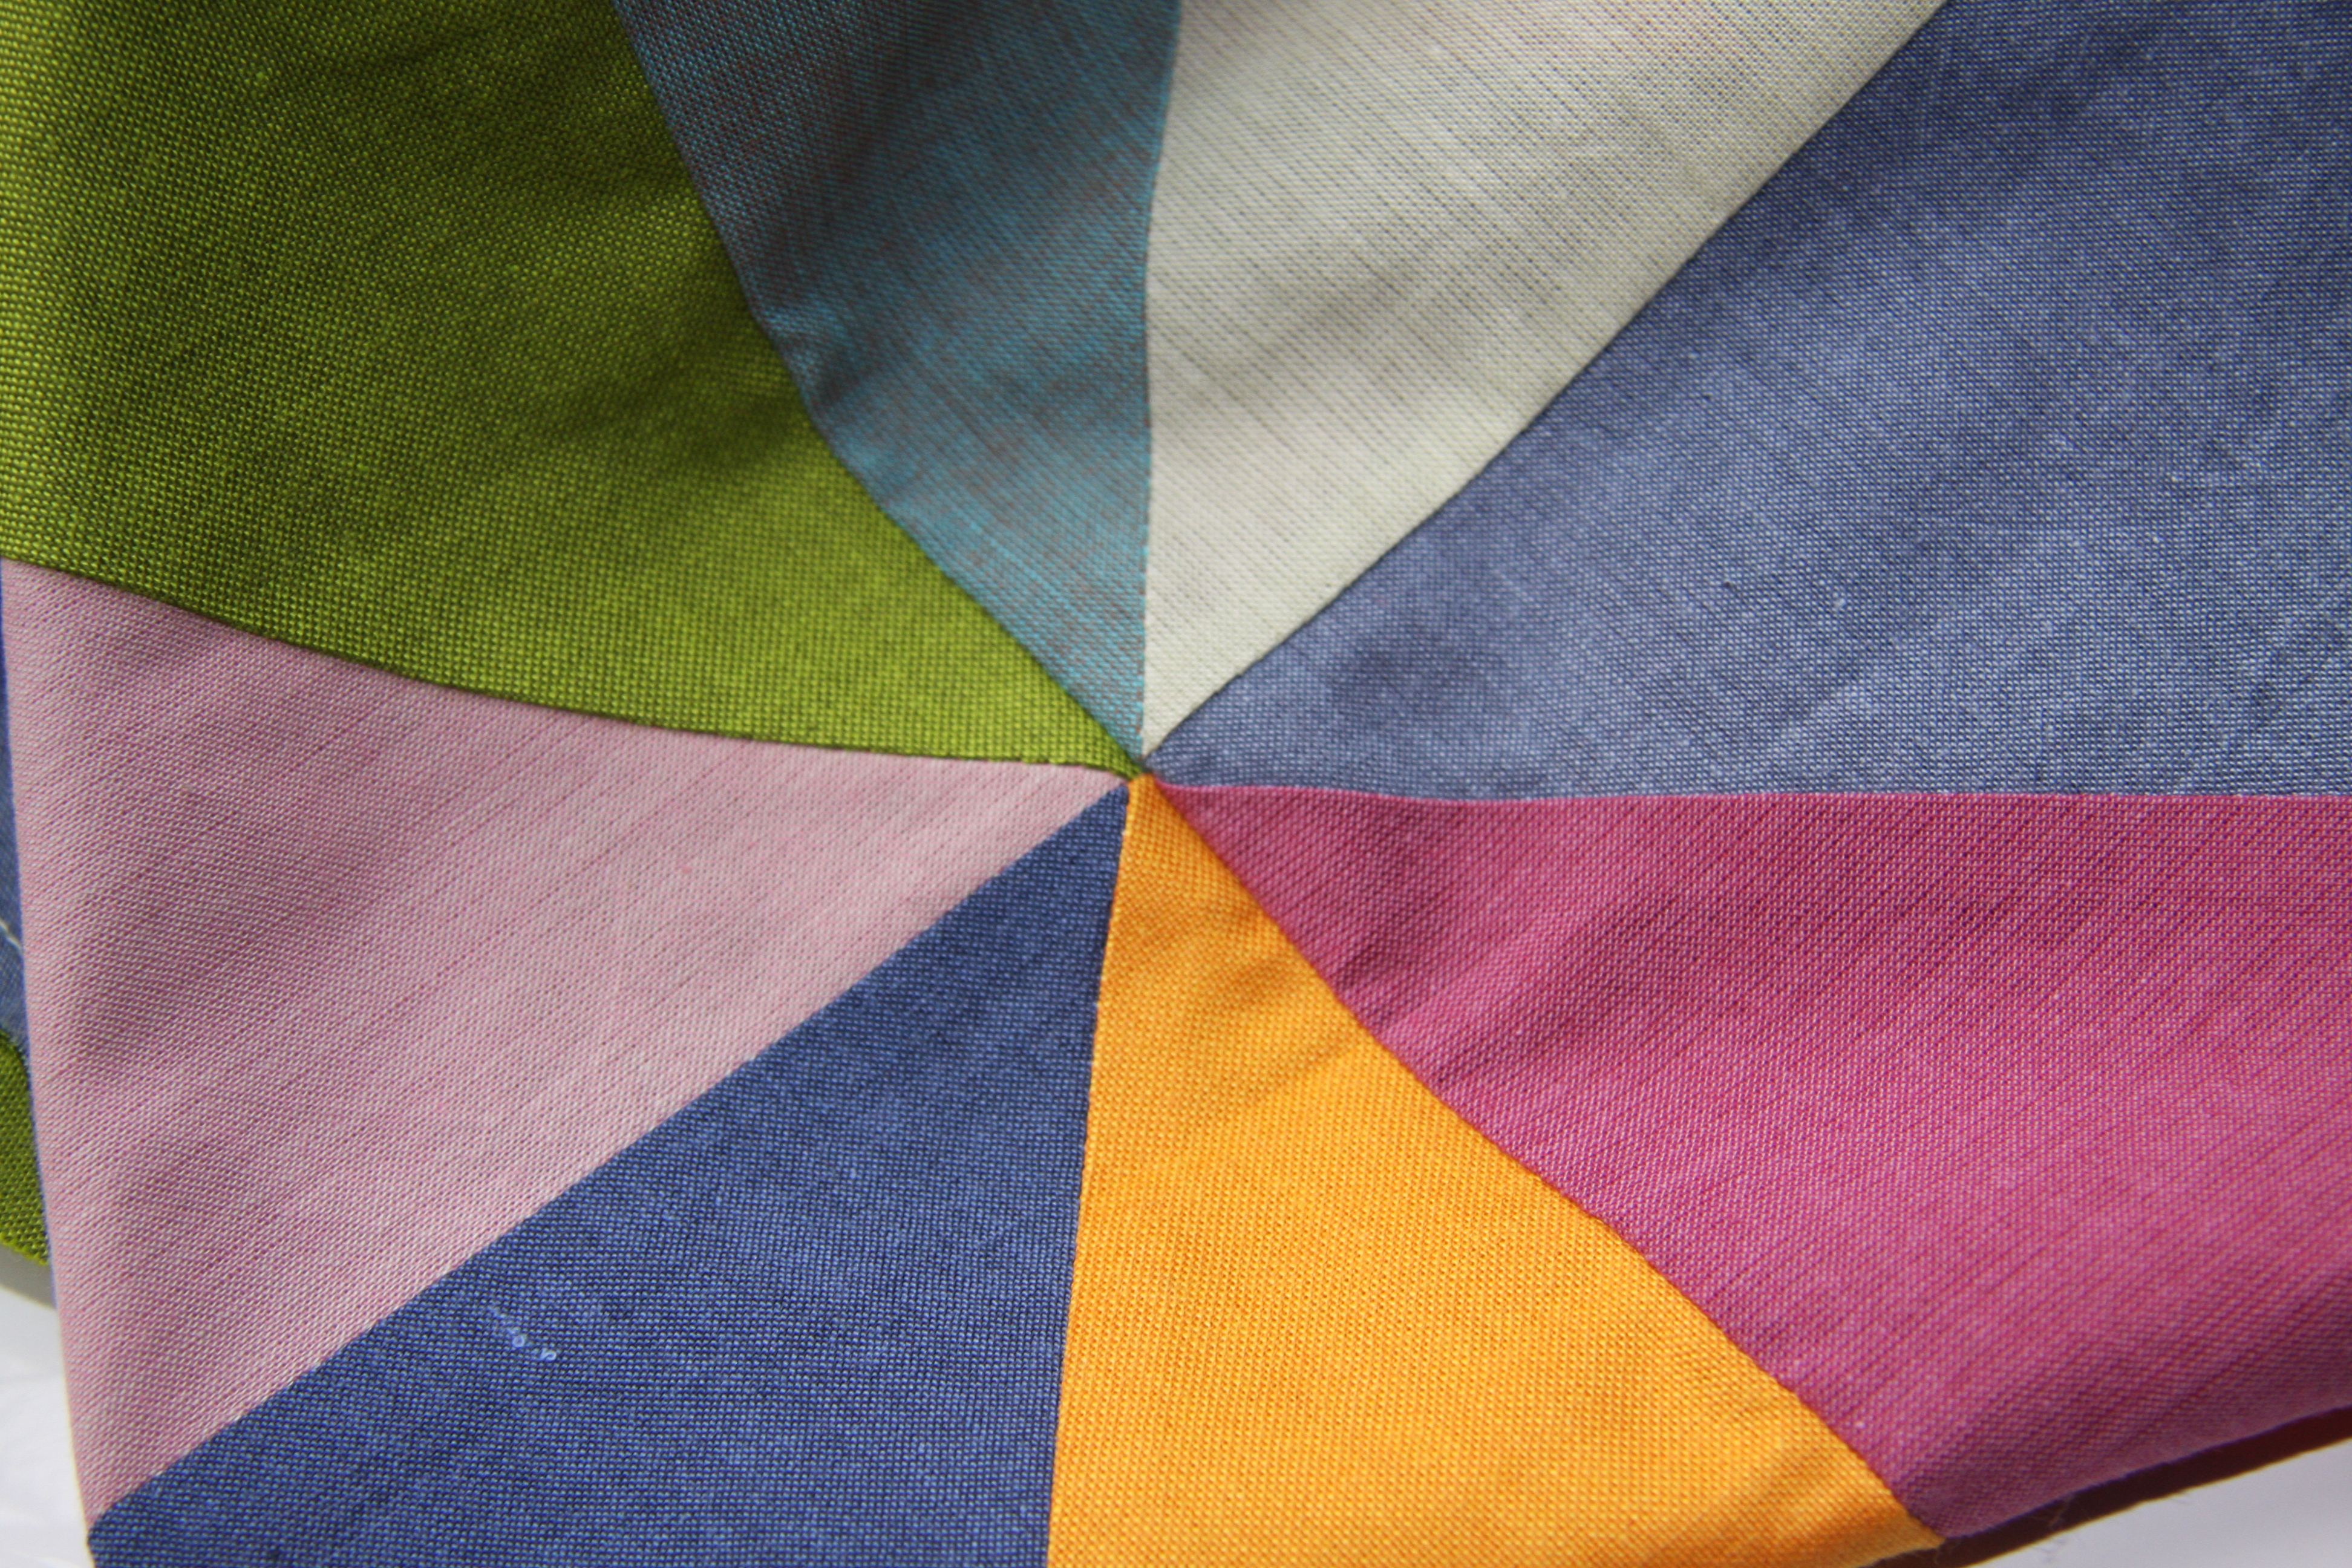
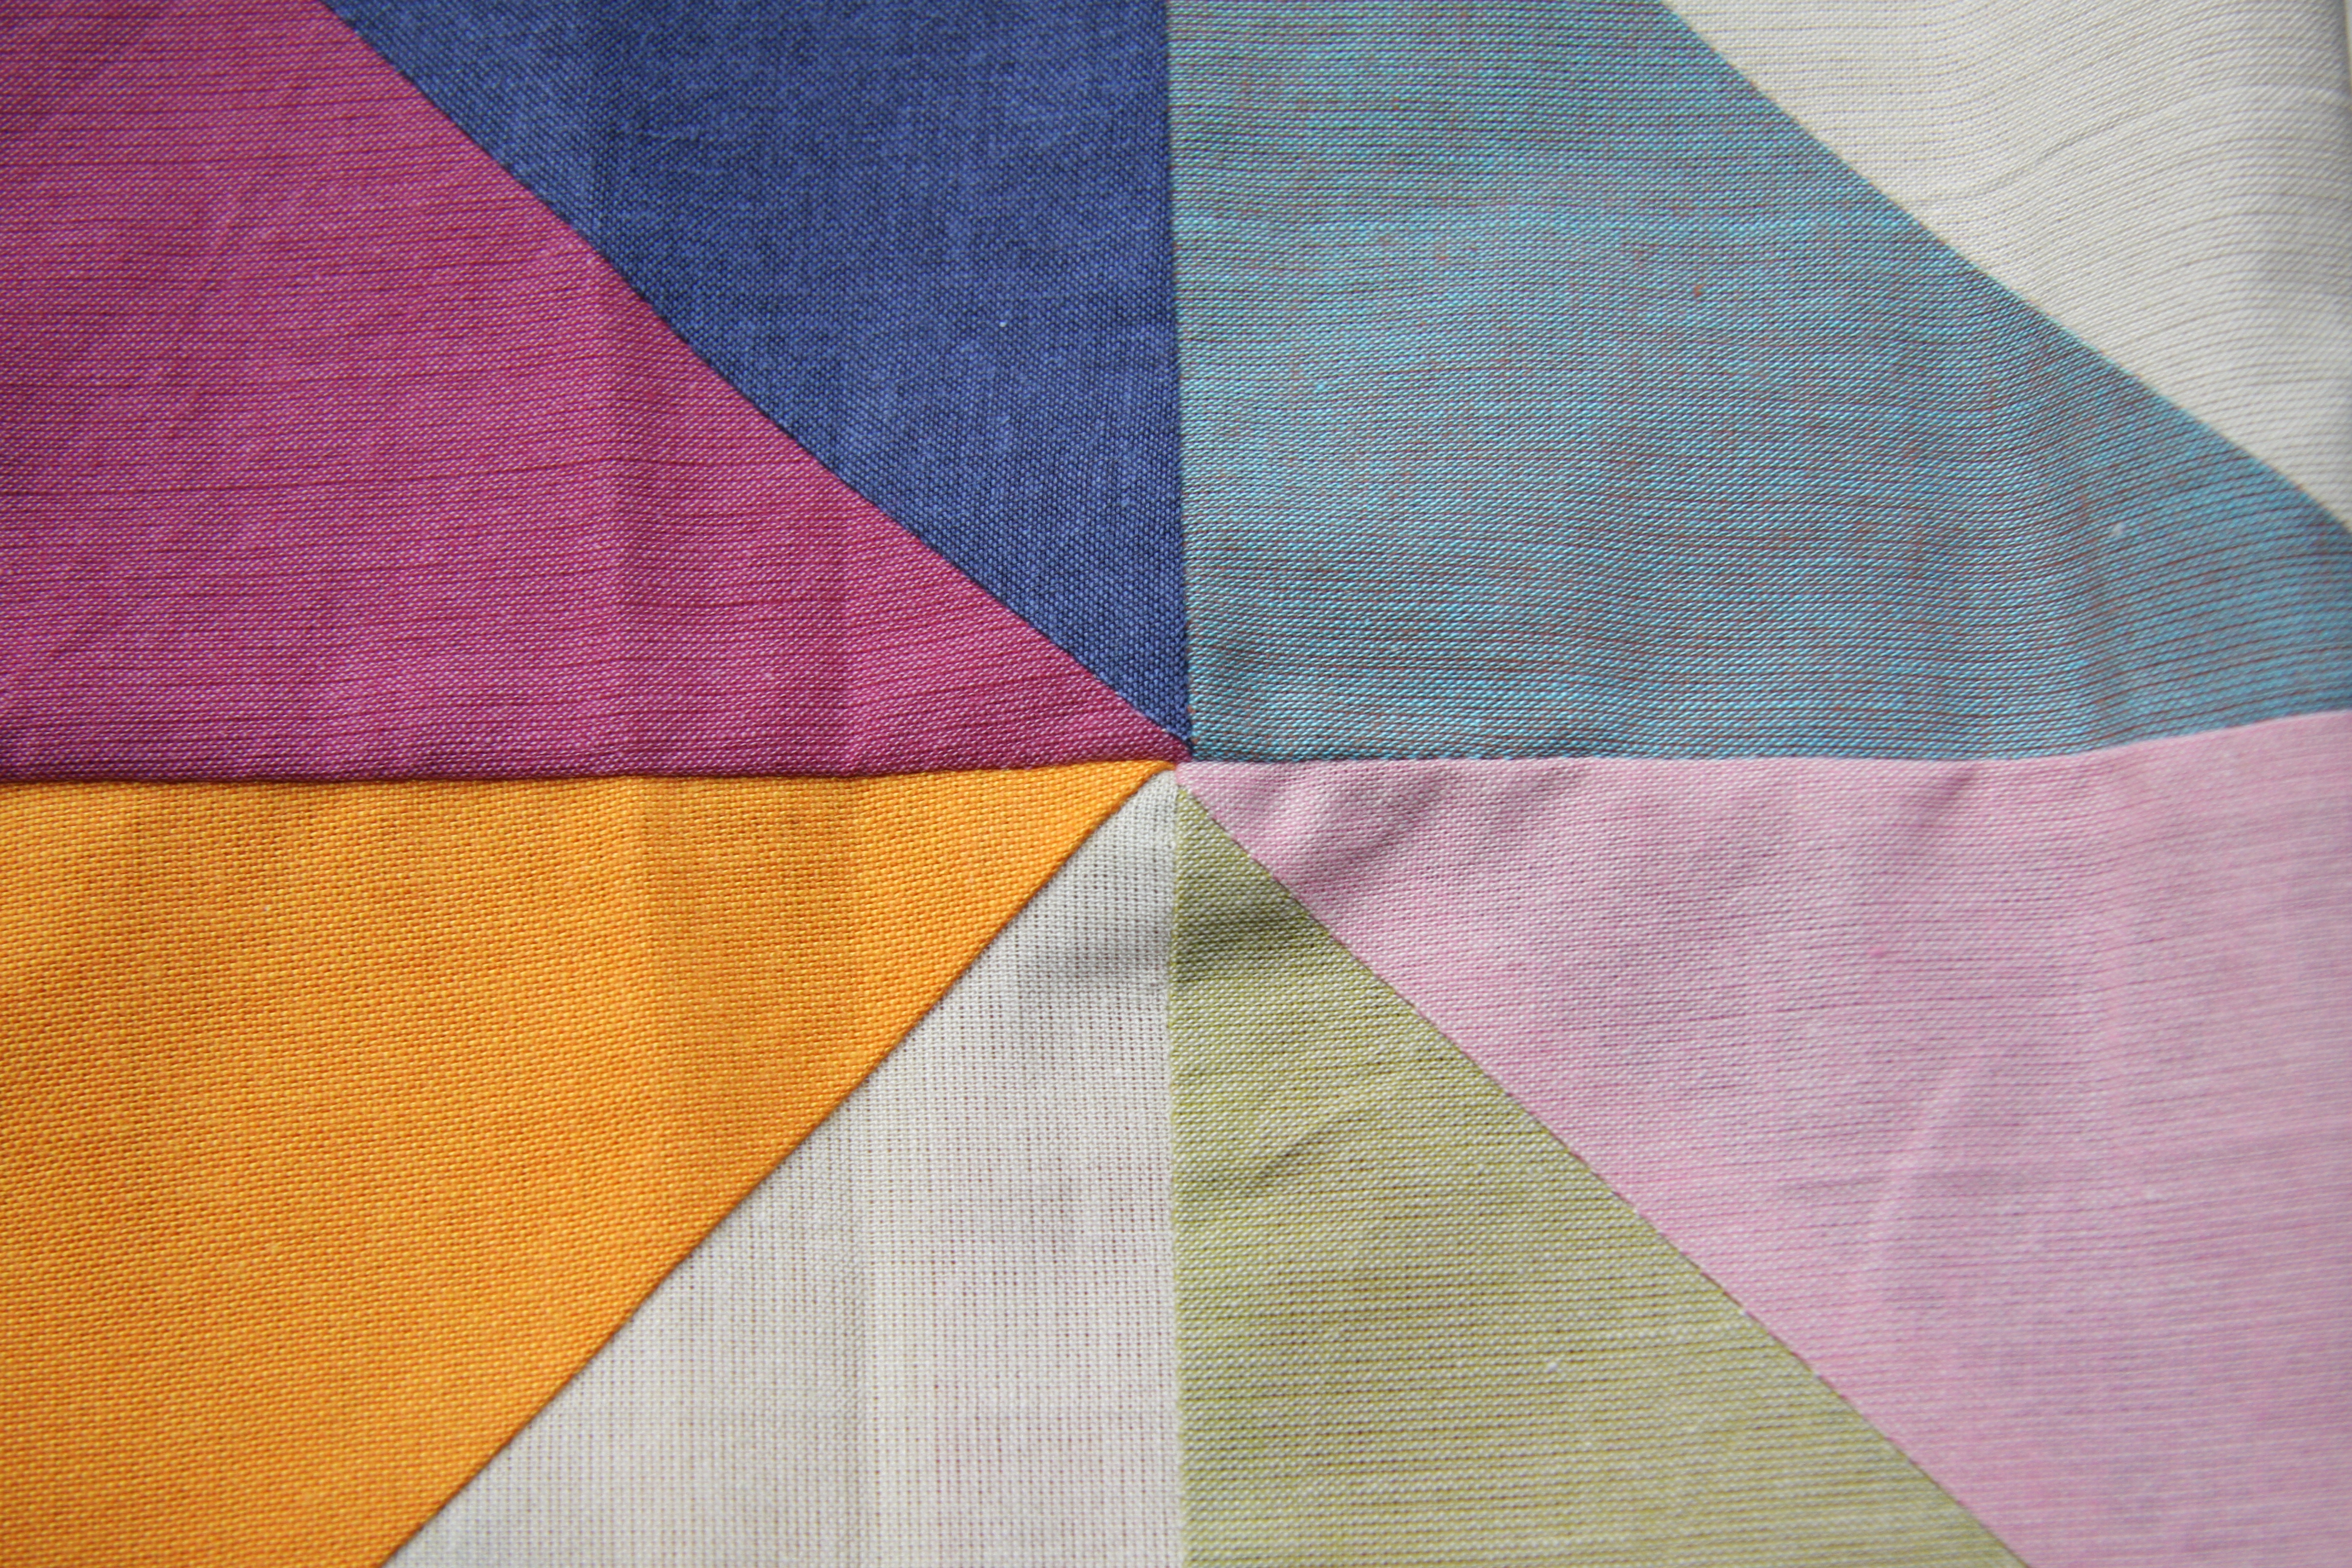
I took inspiration from the ‘Whisper’ quilt in Mary Fons’ Make + Love Quilts, which features rows and rows of equilateral triangles in whites and creams. Yep, more triangles. I need to practice, practice, practice.

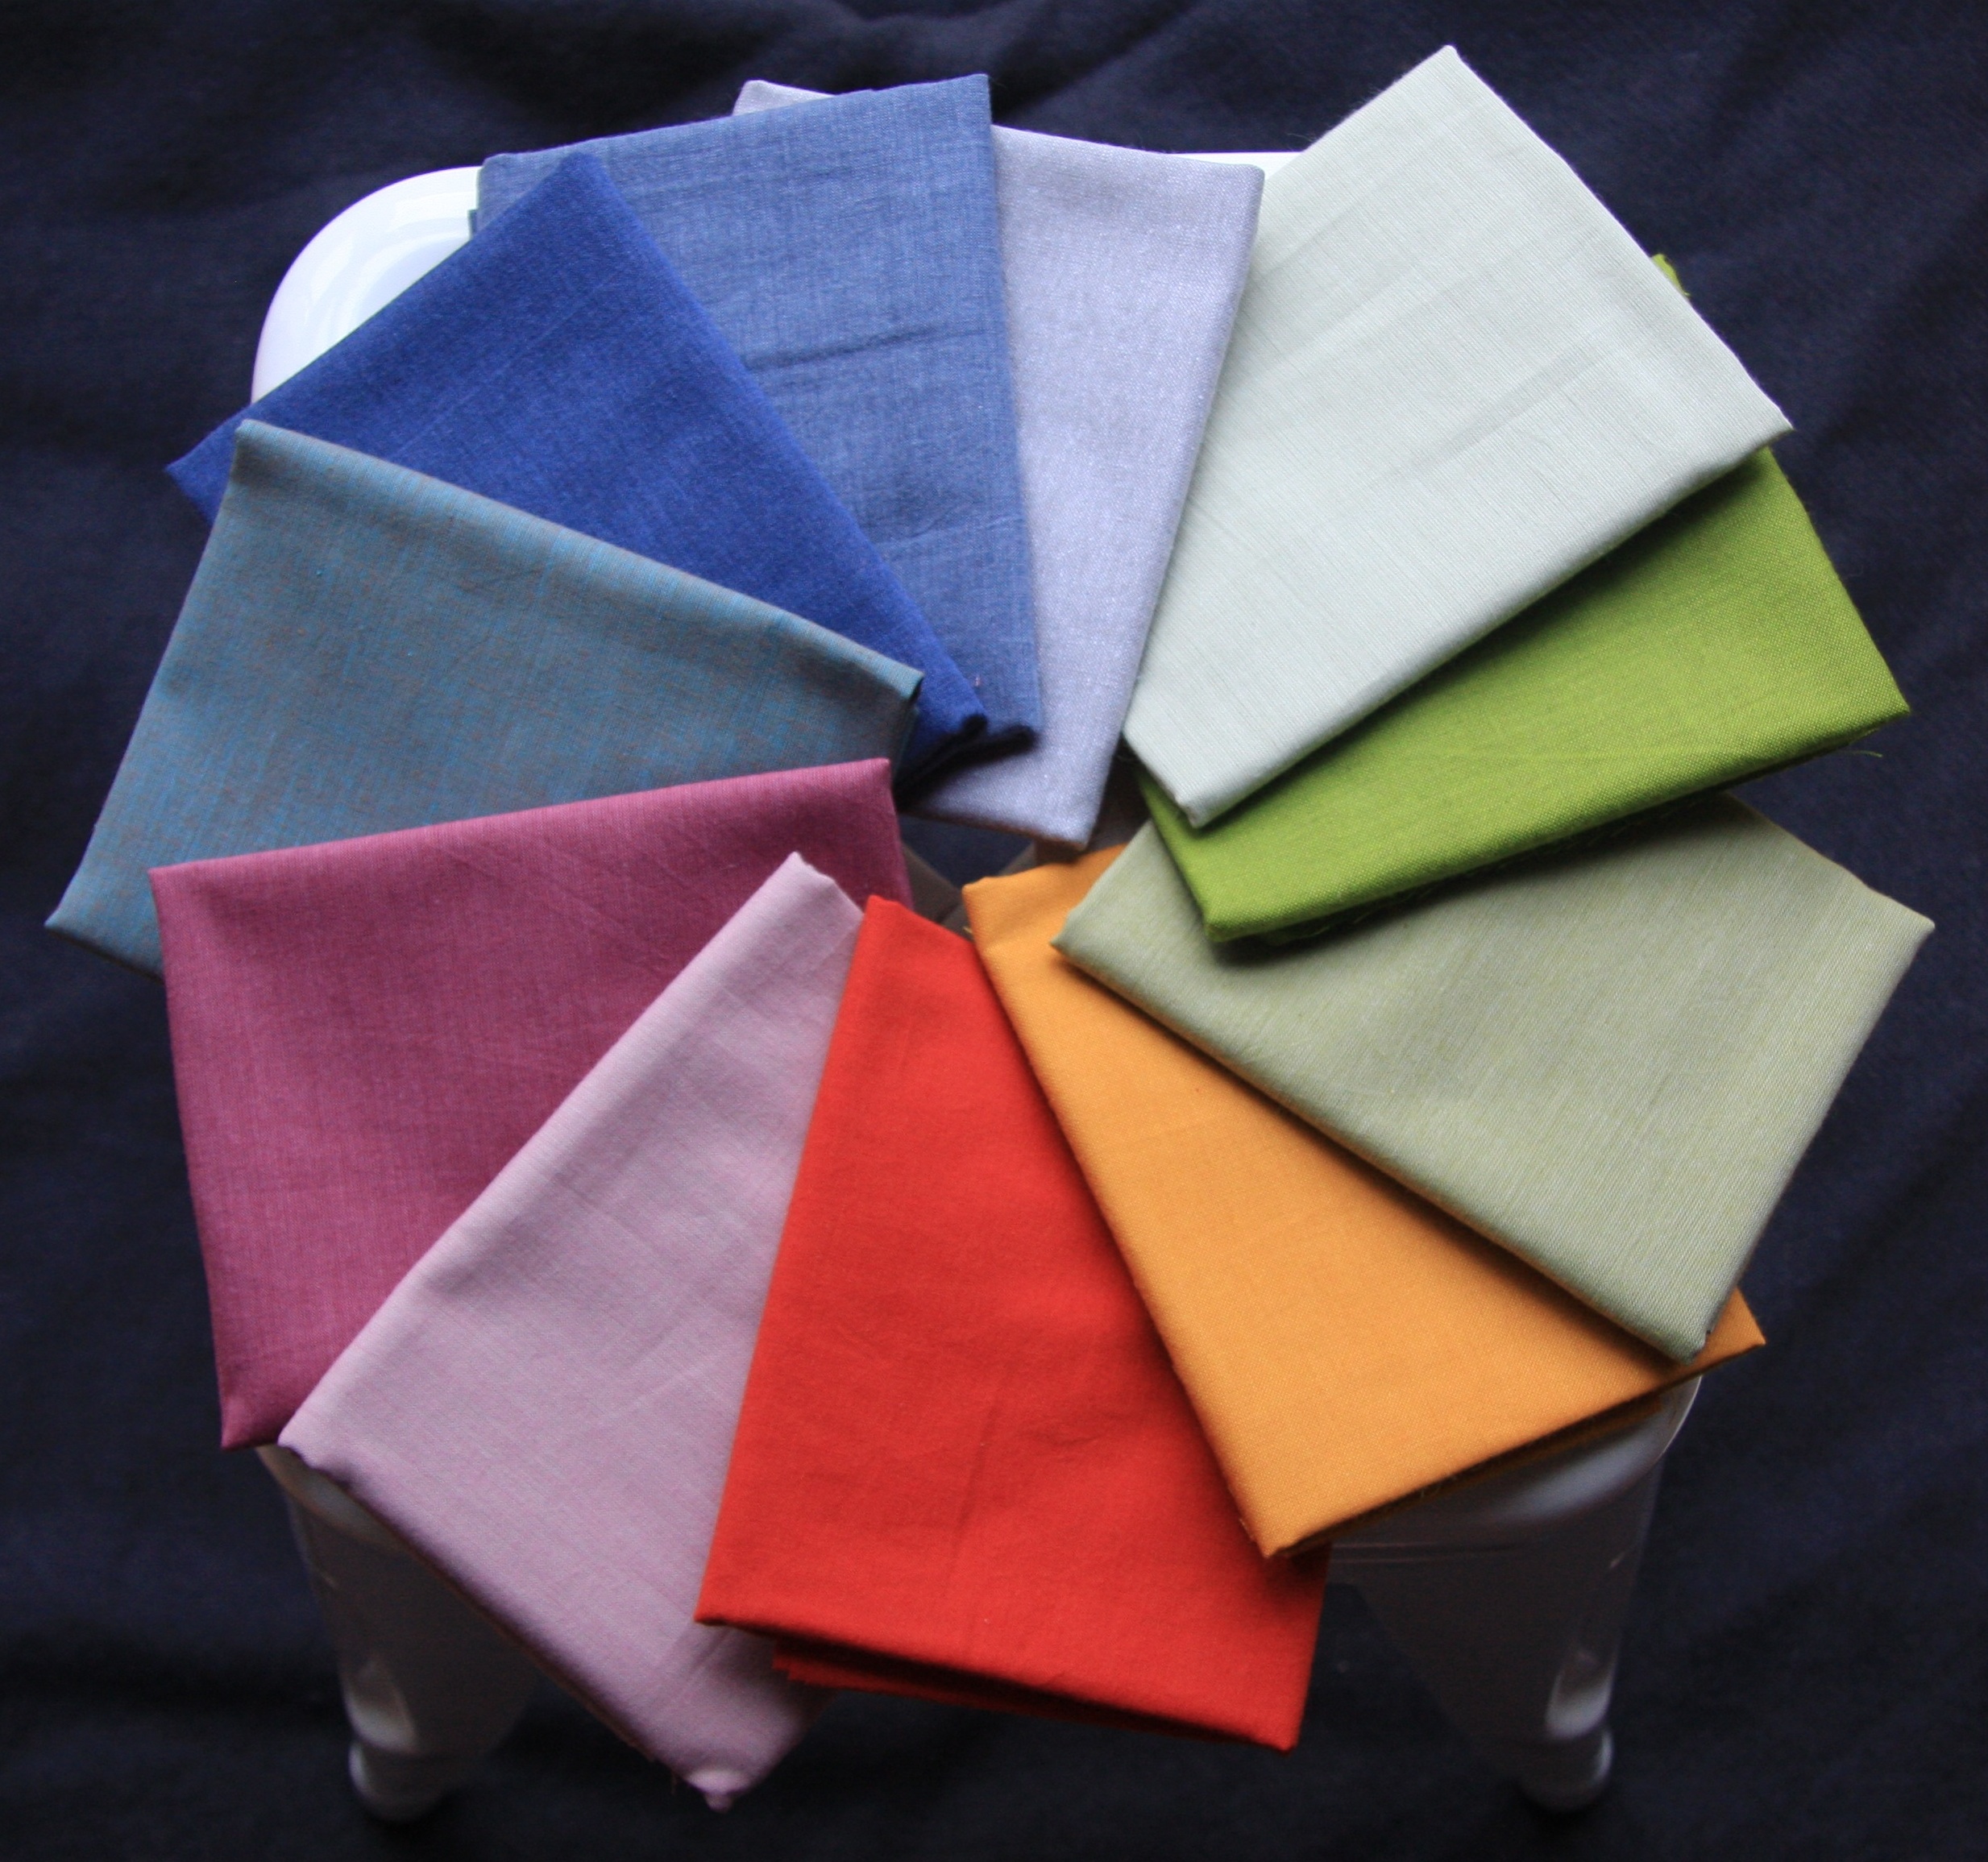
Since (at the time) Christmas was only a few months away, and I was feeling optimistic, I settled on a series of red festive fabrics, and got cutting.

Festive fabric selection in reds.

Festive fabric selection in reds.

I ended up with 8 different fabrics, and cut loads of equilateral triangles — so many I lost count…

A Christmas tree of triangles.

A Christmas tree of triangles.

I’m going to alternate the reds with Robert Kaufman’s Kona Cotton in Oyster. Which means cutting around 250 or so triangles of that too. Once again, I bought too little fabric, and had to go back to GJ’s to buy more… without knowing what colour I’d bought the first time. I’m learning so many important lessons from each quilt I make….

So — the quilt will be 18 rows of 12 triangles across, measuring approximately 54″ x 72″ when it’s done. (No idea how I’ll do the backing on this one either.) I’ve planned out the 18 rows of reds, and have paired and sewn each red to a white (aka oyster). Now I need to iron all the seams in the right direction, and start piecing together the pairs. And then the rows. And then figure out the backing. And quilting. And binding.

Christmas is 46 days away. No rush!

ps. I’m going to keep ‘Try, Try Again’ in mind more from now on.


Progress with problematic points

It’s been a few weeks, but I’m finally making some progress with my half-square triangles quilt.

You may remember I made a small mistake last time, and ended up with half-square triangles that were a little too large. Well, I eventually cut all 150+ squares down to 4.5″, and now have a nice bag of scraps for some future project.

We only have one space in the house where I can lay out squares and find a good design that I’m happy with: the bed. On Friday, I finally placed all the squares in a 12 x 12 arrangement and found a design I liked. Here’s a sneak peek:

Layout out half-square triangles for Quilt #2. Geometriquilt.com

I stacked up each row into a pile of squares, then sewed them together. I tried chain-piecing to save on time (and thread), which ended up working pretty well. I thought I’d get confused about which squares I was sewing, but I managed to find a system to keep it all organised.

Single strips

In the space of a few hours yesterday, I sewed rows 1 and 2 together, 3 and 4, and 5 and 6.

Double strips

Today I’ll do the remaining pairs, then start sewing together the pairs until (hopefully!) the whole quilt top is finished.

I’ve had mixed success with getting all my points lined up. The design of the quilt top is fairly random, which means that the intersections between blocks can have up to 8 fabrics meeting in the middle. Getting all those points to line up is tricky and relies on a lot of careful pinning. Sometimes I managed fairly well…

Not bad point

Other times, I was a smidge out:

Slightly off

If it was more than a smidge, I got the seam ripper out and tried again!

You can also tell from some of these images that the intersections in some places are quilt bulky, thanks to the number of seams that are coming together. I think I should’ve been more careful about which direction my half-square triangles’ diagonal seams were pressed. I pressed them all before cutting down to 4.5″, which means the seams were all facing in different directions when I laid them all out in the final design. Perhaps then I should’ve re-pressed them in single directions depending on which row they were in? That seems like a lot of work! There must be an easier way, but I haven’t figured it out yet.

It’s just after midday here in Melbourne, so I better get busy!

Started! My second quilt….

It’s been almost a month since I wrote about finishing my first quilt. I’d love to say I’ve been too busy quilting since then to write anything, but… that’s not quite true. I have made a start on Quilt #2 though!

I decided to make another basic quilt using half-square triangles (HST) instead of simple squares. I wanted to make it bright and cheerful, so I bought some beautiful peppered cottons and shot cottons. Check out these colours!

Image

I bought 30 cm of each colour, and cut them into 14 squares each.

Cut_squares

Such beautiful fabric!

closeup

I have 11 different colours and 14 squares each… that’s a lot of squares. After laying them all out, I paired them up in every permutation possible and ended up with a very attractive stack of 77 pairs.

stack

The next step was to make the half-square triangles. I used a chalk wheel to mark the diagonal across each pair of squares, then sewed quarter-inch seams down each side.

diagonals

Then cut down the middle and voila! Two half-square triangles.

Now, this is where I admit that I used the wrong measurements…. To make half-square triangles, you need to cut squares that are 7/8 inch bigger than the finished size of the HST. I want the finished half-square triangles to measure 4 inches, which means I should’ve cut 4 7/8 inch squares. In the week or so between investigating this online and finally getting my rotary cutter out, however, I managed to get it into my head that my squares should be 5 7/8 inches. Oops.

So now my HSTs are about an inch too big. I’ve decided I’ll cut them down to size (using my Bloc-Loc ruler!), stick to the original measurements I wanted, and do something interesting with the scraps. That’s the plan for this weekend. Watch this space!