Sunday sketch #456
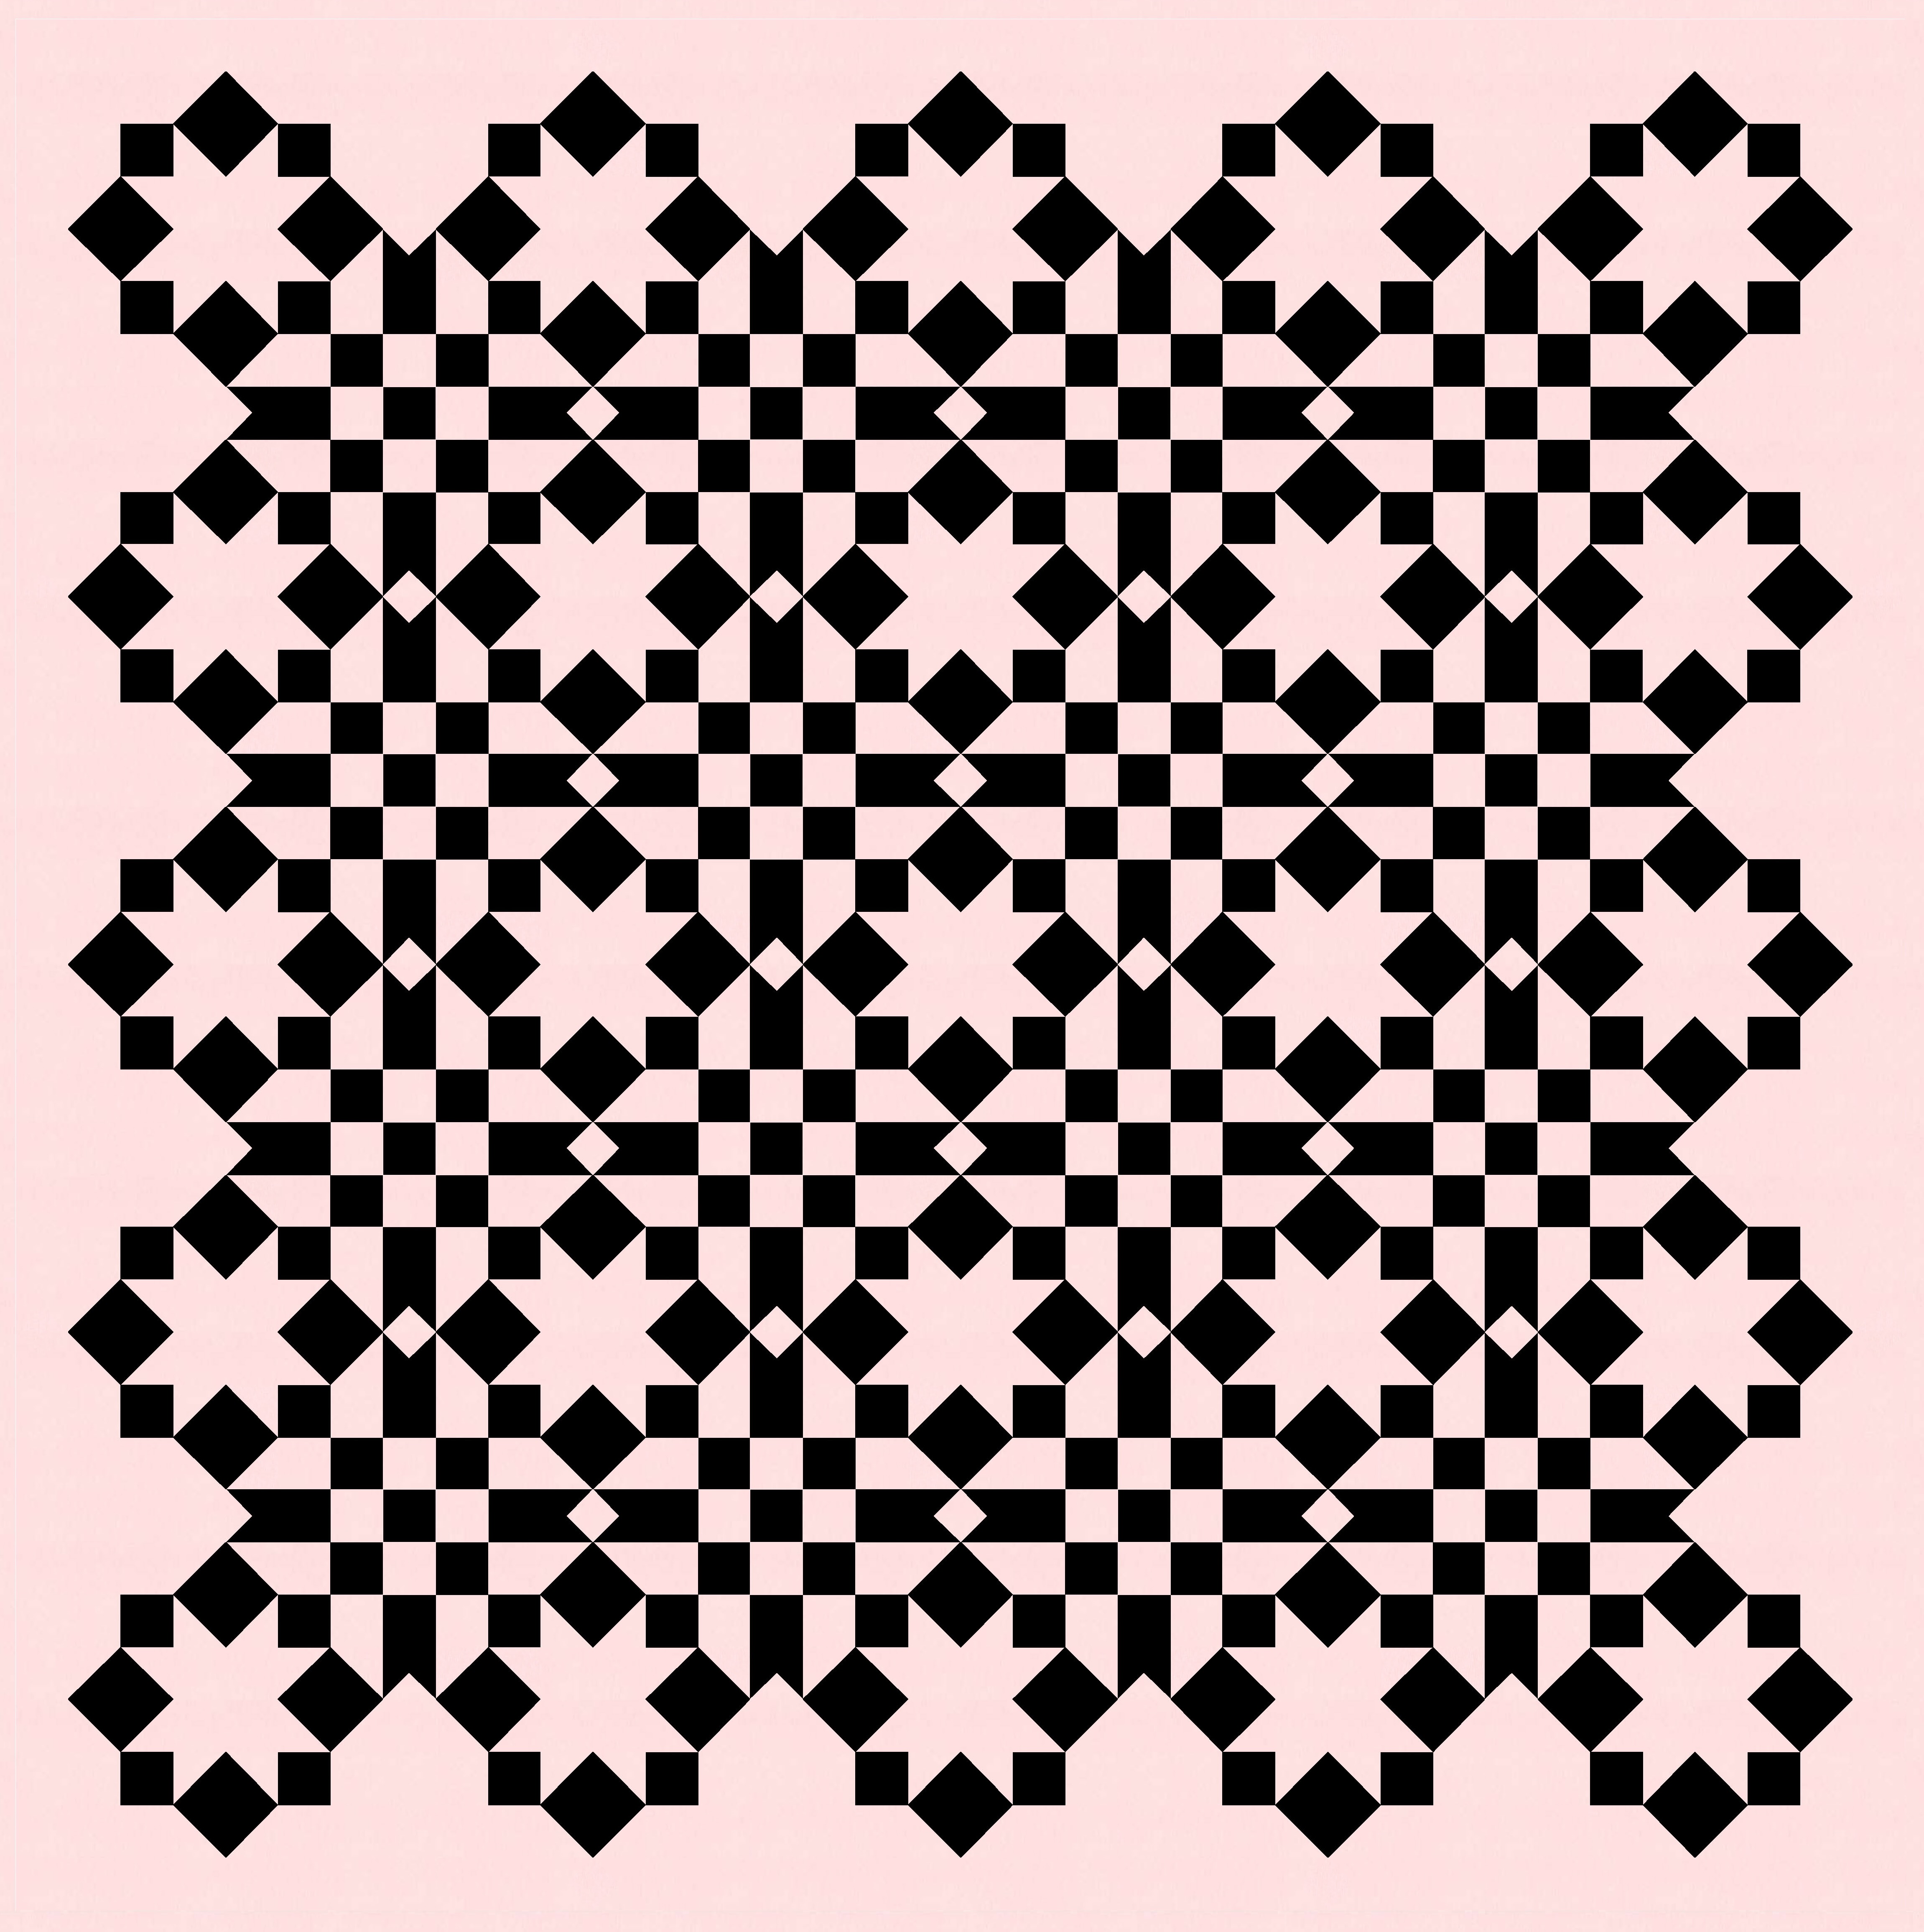
More square-based sawtooth stars this week. Well, one star, lots of designs. The main block is the same as that in Sunday sketch #454 (from 2 weeks ago), but I’ve added some sashing with another connecting shape to create a bunch of variations.

To develop Sunday sketch #454, I began by tiling the blocks, then added some small squares (at the corners of the blocks) to join diagonally adjacent sawtooth stars. (Go take a look to refresh your memory.) But to fit any more squares in that space – like, to make a cute 9-patch instead of a 4-patch, for example – I’d have to move the blocks further away from each other. One way to do that is by adding sashing.
So that’s where I started for this week’s design: I added sashing between the blocks (white, in the version below) and an extra black square at the corners where four blocks meet.

I like that, but I can see space where another shape would fit nicely. The four large squares that make up each sawtooth square (at the north, south, east and west positions in the star) are just kinda hanging out in the open. How about we connect them to their neighbours? There’s not enough space to add a square of the same size (we’re limited by the width of the sashing), but we can put a smaller square in the same orientation.

Those little squares also help to enclose some of the secondary shapes that are created between the blocks.
If I use just two colours to show you all the shapes, you get a better idea of what’s going on. (Actually I’m not showing you all the shapes here, because I haven’t differentiated the middle square in the sawtooth stars from their eight outer triangles). But you get the general idea: there are lots of shapes to play with and colour!
There are so many elements that it could be easy to get a little overwhelmed. I’m using a limited palette to avoid that… but also keeping certain elements coloured the same across all blocks.
For example, the sashing can be coloured the same as the sawtooth star squares, while leaving the smallest connecting squares ’empty’ (i.e. same as the background)…


…or the sashing can be coloured differently from the stars and the background, with the connecting squares coloured the same as the sawtooth star squares.


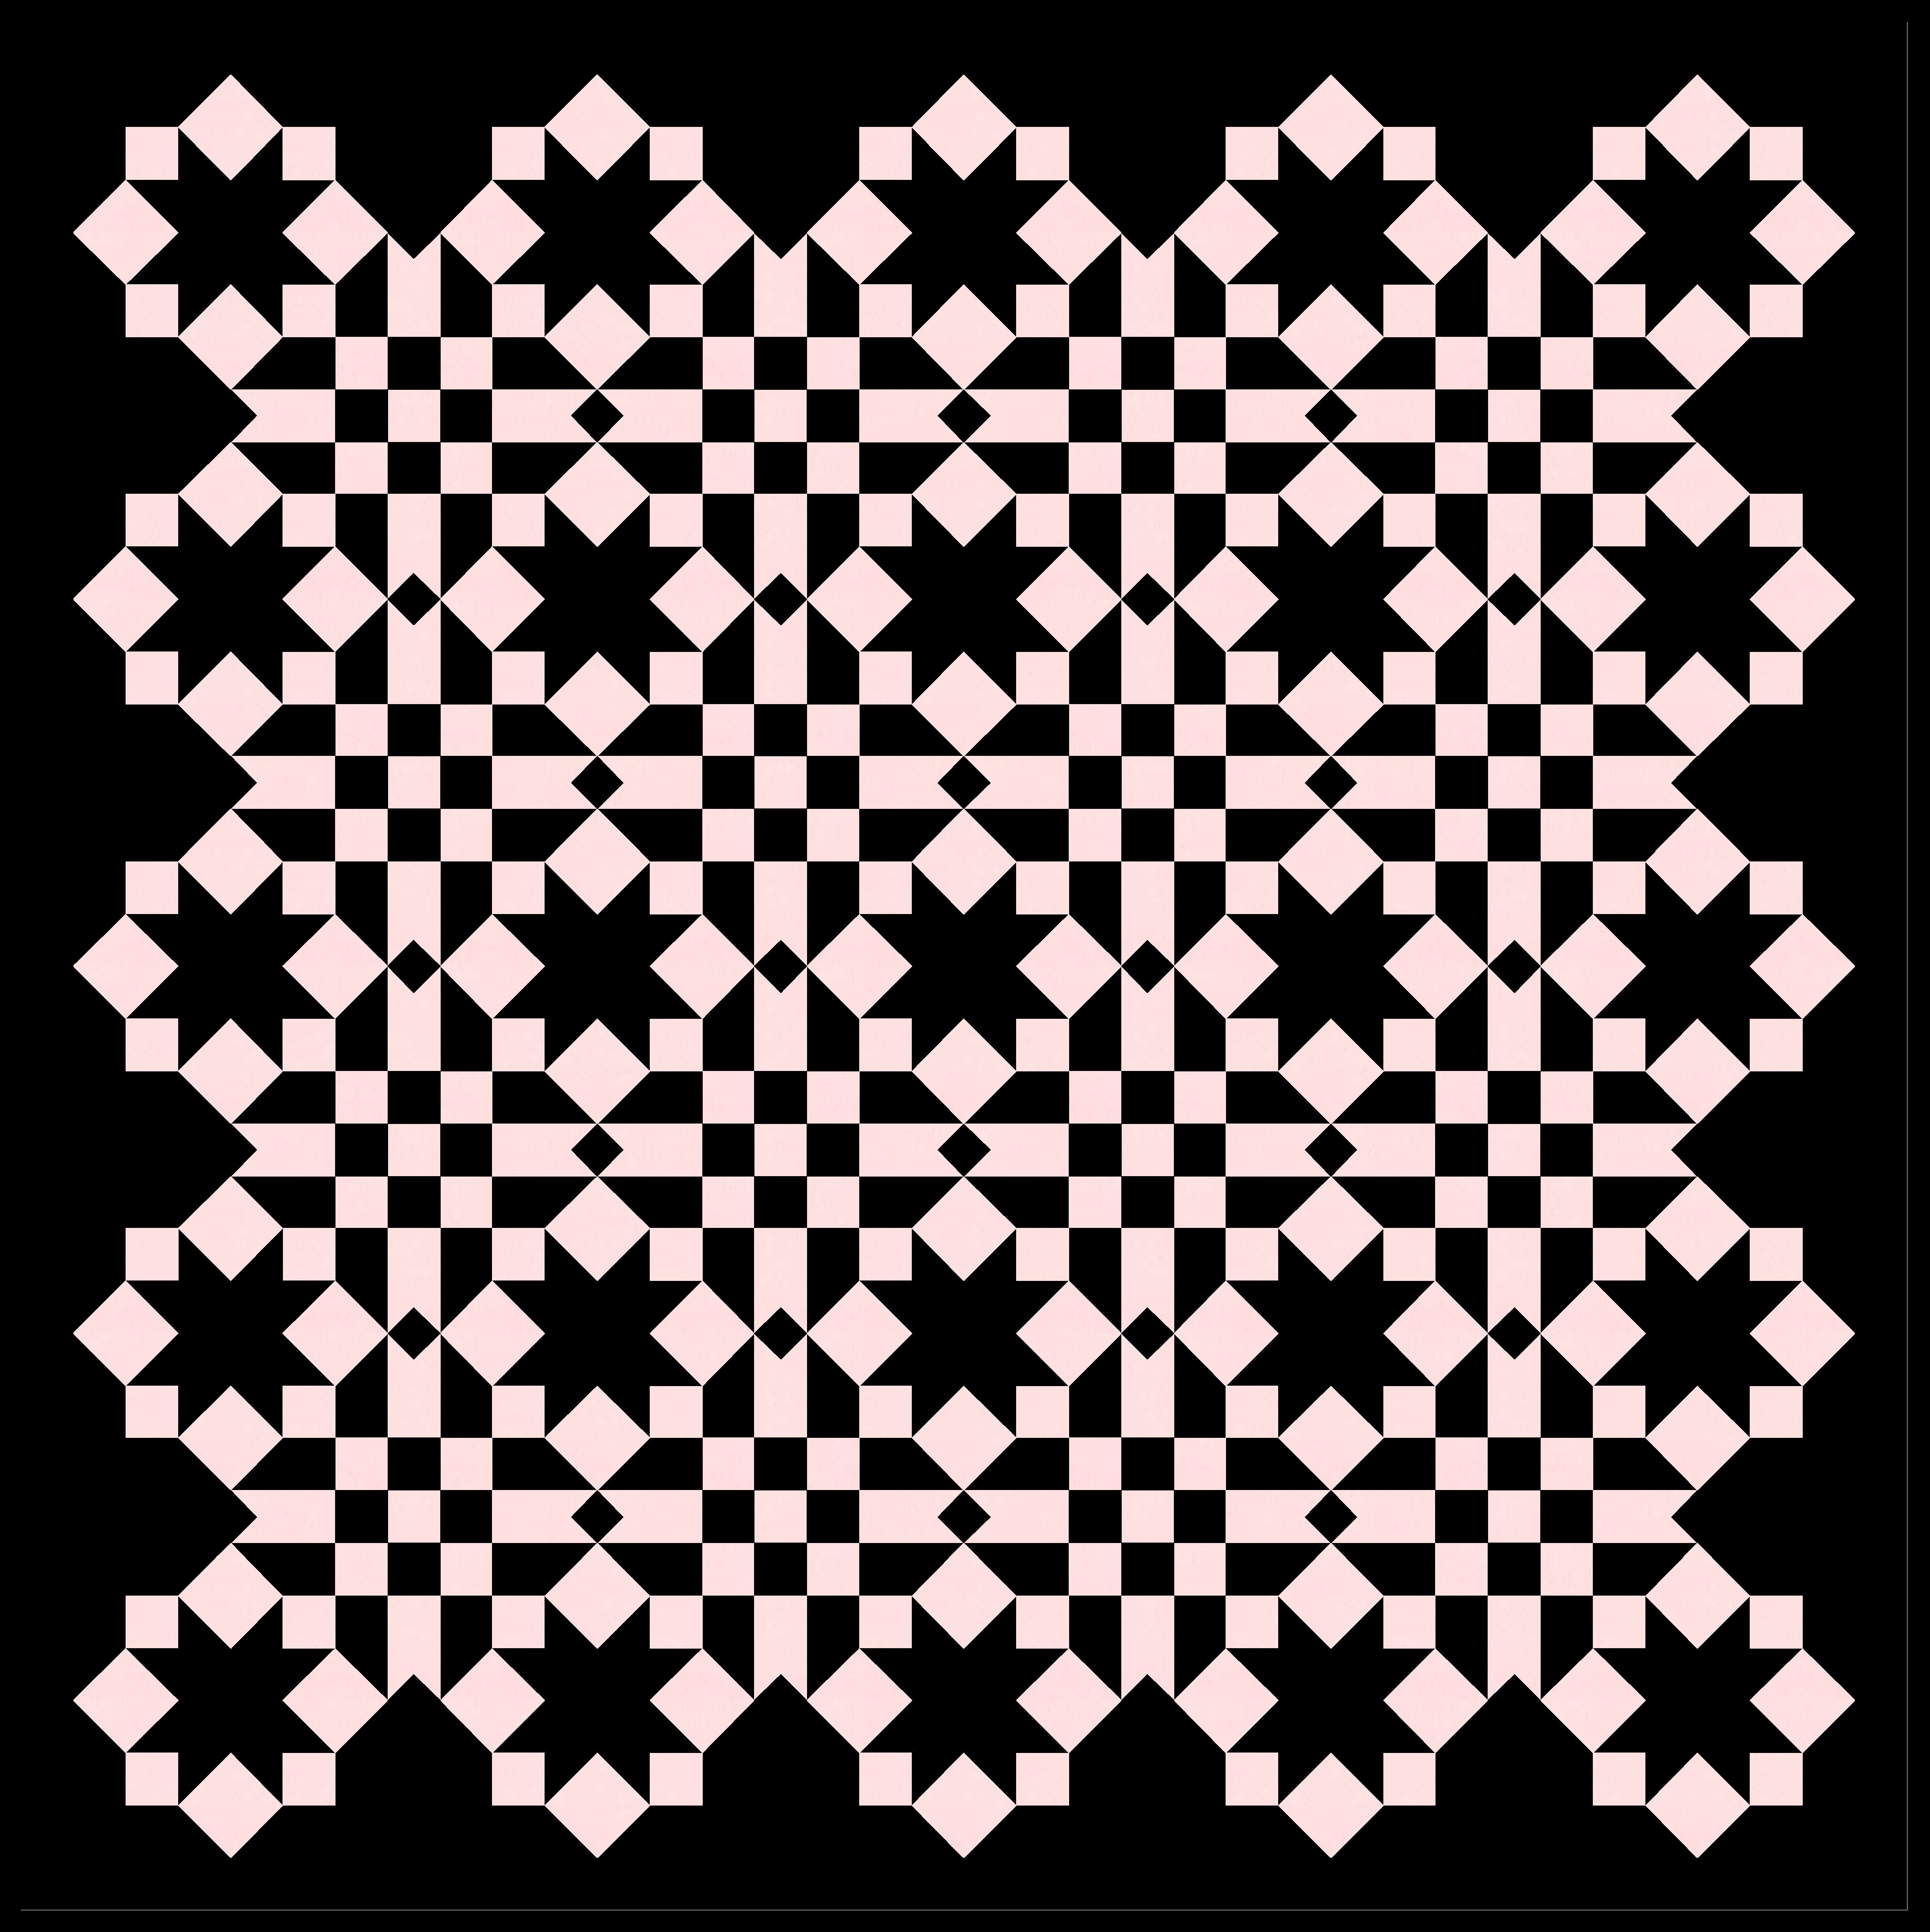
Or I can colour the sashing the same as the background, instead. Here I’ve filled out all the blocks (instead of trimming the outer blocks to create an interesting perimeter). With the sashing joining the background, the blocks look like squares connected only by their middles and corners.

But the fun part is paring elements away. I often think about certain shapes as being important only if they’re associating with other shapes, which then prompts me to remove outer / ‘orphan’ shapes. So, for example, the outermost squares in each block are only really interesting if they form part of a 9-patch, so I can remove any of those squares that are just kinda hanging on their own. And then if they’re not there, the pink outer parts of those blocks aren’t doing much either, so they can go.

And if I keep trimming, other interesting things pop up. This next version really emphasises how the sawtooth stars are all created by squares… the entire outer edge of the design is now made up only by squares of three different sizes.

Or I can keep peeling away to emphasise other parts of the design. Here, the shapes between the stars – created by the outer edges of adjacent blocks and the sashing in between – might appear to be the main blocks. (If I removed the orange triangles from the sawtooth stars (i.e. by colouring them in the background colour), I think those stripy/9-patch shapes would look even more like the ‘real’ blocks in this design.)

And then I can remove that last layer, so the 9-patches now take centre stage. (I changed the background colour in this next version so that the outer sashing didn’t disappear into the background.) Technically I could’ve removed the outside squares of the outer 9-patches, since they’re not attached to any blocks so don’t really make ‘sense’. But not everything in a quilt needs to make sense 🙂

Anyway, you get the general idea. Once I’d removed all those layers, I started adding different stuff back in. I kinda liked the idea of different layers of the design using different parts of the palette; not all colours have to appear in all blocks.

It’s when I added these elements that I ended up with the version I’ve shown first and shared on Instagram this week.

Of course, with so many elements, there are (almost) countless ways to colour this design, and each time you’ll end up with something that looks a little bit different. The design can end up feeling quite playful or more serious, depending on your palette and colour placement.


I like the idea of using a limited palette and picking out certain elements to emphasise… maybe the 9-patch and the little diamonds in the sashing… or maybe just those little diamonds on their own. Or the interesting corners of the blocks, or just the sashing. Lots and lots to play with.


The basic block this week is the same as 2 weeks ago, so would only need squares and half-square triangles or flying geese to make into an actual quilt. The sashing would require rectangles, squares, and a square-in-a-square unit (quite a small one, so you might choose to use paper piecing or a template for accuracy). Whether you go busy (like I have in the first version, above) or restrained (like some of these last versions) is up to you!
Discover more from Geometriquilt
Subscribe to get the latest posts sent to your email.
