Sunday sketch #276
I revisited wedges recently (after first playing with them around 2 years ago – see Sunday sketches #219, #220 and #221). This isn’t the first design I made (keep reading to see that one), but it does use the first block I came up with.
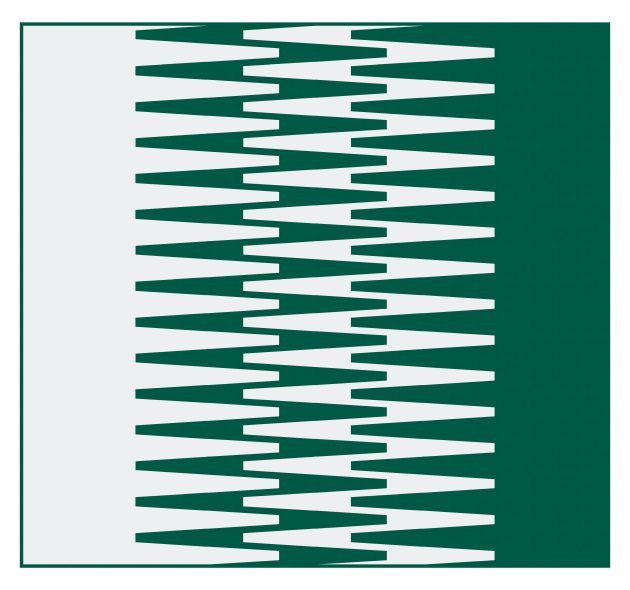
I really like those two vertical columns in the middle of the design where the points of the wedges meet, so I pared the colour palette back to emphasise them: white on the left, green on the right. Are these green shapes on a white background, or white shapes on a green background?

I like the portrait-orientation layout too, although the landscape version still appeals more for some reason.
But anywhere, here’s where it started – the same block, with the wedges lying horizontally, but using a slightly larger colour palette.
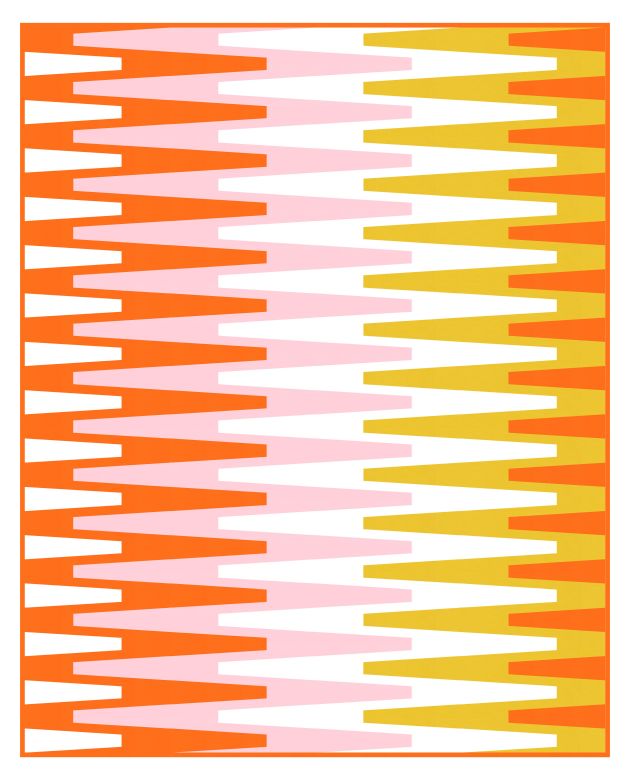
This feels a bit more mid-century modern, maybe. I love how the wedges nest into each other; the colours can play quite differently with one another depending on where they’re placed.

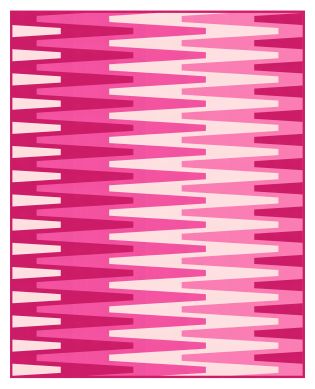
In the version on the left, that white zig-zag shape sinks into the background, whereas the same shape in the version on the left (in light pink) comes to the foreground.
Often how I draw a block in ElectricQuilt 8 is not how I’d actually make it in fabric – I usually draw in the way that gets the idea from my brain onto the screen most quickly or that’s easiest to colour in quickly. But that can mean that shapes are cut off in weird ways or there are seams in weird places… or that the block wouldn’t use fabric in the most straightforward or economical way.
So even though these last few designs are a 4 x 5 block layout, I wouldn’t make them this way (it would mean a lot of paper-piecing with a bunch of different templates per block, and lots of seams within each wedge). Instead, I’d paper-piece vertical columns (9, in this case) of horizontal wedges, then match them up. Each zig-zag shape would be made up of 5 columns of wedges: the left-most pointy bit, the main bit on the left, the middle bit, the main bit on the right, and the right-most pointy bit. Does that make sense? Maybe I’ll have to try making it so I can post pics to show you what I mean!
Discover more from Geometriquilt
Subscribe to get the latest posts sent to your email.

It’s certainly a challenge to work out how to make these clothes pegs/ zips but, yes, foundation piecing is the key.
Question: why do I prefer a rectangle to a square? Why do I want to push the pegs in the top design off centre?
Haha I tried a portrait layout (for the horizontal wedges) but ultimately decided that it required too many wedges; they become smaller/thinner with respect to the overall design and I didn’t like the scale. And I tried off-setting the wedges too, as a purposeful counteraction against my usual symmetry-loving self. If I was going to make this for a modern show, for example, I’d probably go for the asymmetry. Maybe. Haha!
i am pretty good at EQ but I have no idea how you make these blocks. I would love to know. I love love love seeing these every week. Thank you!
Thanks Christy! This one was pretty easy; I made the block using the EasyDraw function in the Block Worktable, tiled it in the Quilt Worktable, then used the ‘Symmetry’ button (under ‘Block Tools’) to play around with the layout. Each block has 12 pieces, 3 of each colour: a large rectangle, a small rectangle, and a square.