Category: Sunday sketch
Sunday sketch #277
This week’s design is a direct evolution of last week’s, although it might not be so obvious when you first look. I’ll walk you through it.
It’s wedges again, but this time, they’re arranged to give an almost woven effect. This first version is like two pieces of fabric, red on the left and white on the right, woven together in the middle.

And because I know a few readers like asymmetry, here it is again in portrait orientation, slightly off-centre 🙂

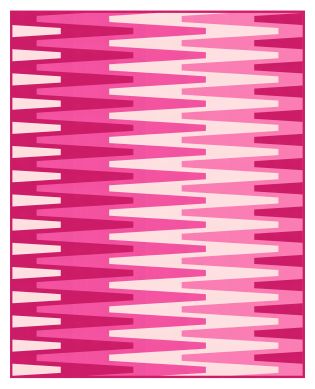
If I colour the columns of wedges in different colours, you can see more clearly how they interact. Notice in the design on the left, the ‘arms’ within each column of wedges span the width of that column, crossing over the centre spine. But in the design on the right, I’ve staggered the arms. Each one just meets the centre spine instead of crossing over it. Just a minor tweak – in this case, flipping a block of wedges – gives a whole new look.
Now can you see how I evolved the zippers from last week’s design into the woven look in this week’s design?


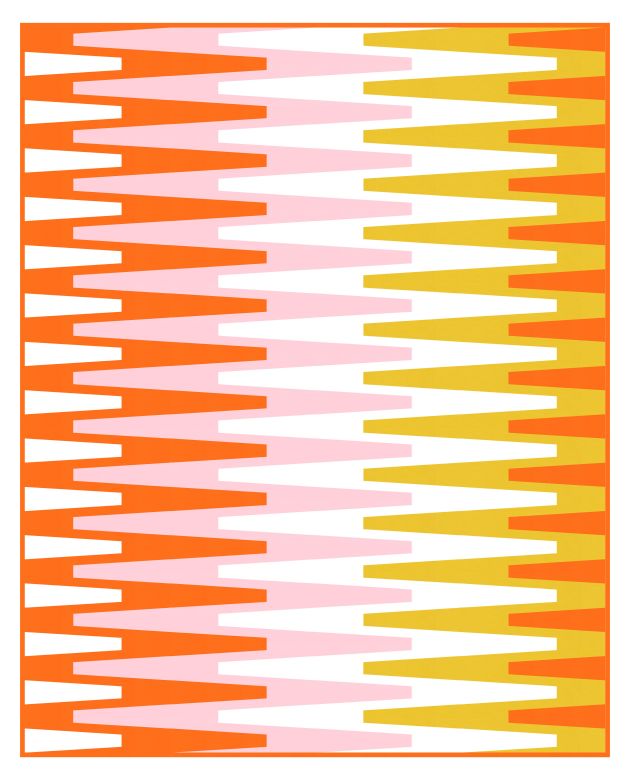
Here it is in another colourway – a bit like Fanfold. This palette is one of my favourites at the moment.


So, like last week’s design’s, this week’s are all wedges. You could make these designs into quilts using long columns of wedges. The fact that these wedges have borders makes things a little trickier for paper-piecing; I can’t see any way to paper-piece them without adding a seam somewhere awkward. Traditional piecing might actually be better, although you’d need templates for cutting out the wedge shapes. If I had more time and sewing space, this is the sort of thing I’d love to test out, just to satisfy my curiosity!
Sunday sketch #276
I revisited wedges recently (after first playing with them around 2 years ago – see Sunday sketches #219, #220 and #221). This isn’t the first design I made (keep reading to see that one), but it does use the first block I came up with.
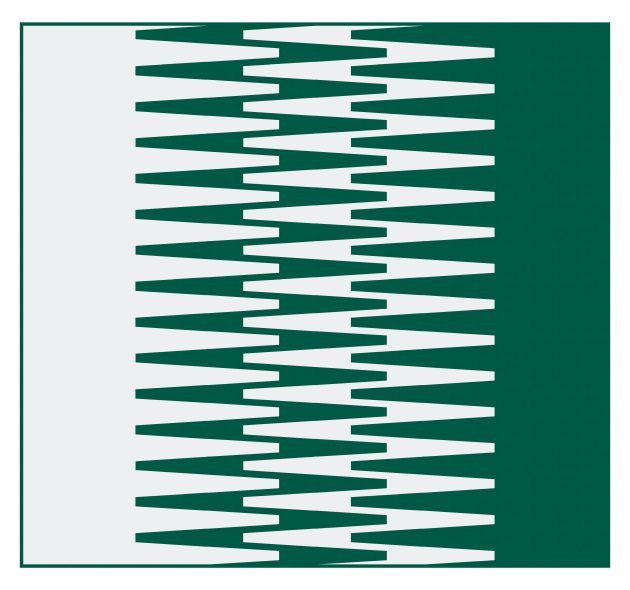
I really like those two vertical columns in the middle of the design where the points of the wedges meet, so I pared the colour palette back to emphasise them: white on the left, green on the right. Are these green shapes on a white background, or white shapes on a green background?

I like the portrait-orientation layout too, although the landscape version still appeals more for some reason.
But anywhere, here’s where it started – the same block, with the wedges lying horizontally, but using a slightly larger colour palette.
This feels a bit more mid-century modern, maybe. I love how the wedges nest into each other; the colours can play quite differently with one another depending on where they’re placed.

In the version on the left, that white zig-zag shape sinks into the background, whereas the same shape in the version on the left (in light pink) comes to the foreground.
Often how I draw a block in ElectricQuilt 8 is not how I’d actually make it in fabric – I usually draw in the way that gets the idea from my brain onto the screen most quickly or that’s easiest to colour in quickly. But that can mean that shapes are cut off in weird ways or there are seams in weird places… or that the block wouldn’t use fabric in the most straightforward or economical way.
So even though these last few designs are a 4 x 5 block layout, I wouldn’t make them this way (it would mean a lot of paper-piecing with a bunch of different templates per block, and lots of seams within each wedge). Instead, I’d paper-piece vertical columns (9, in this case) of horizontal wedges, then match them up. Each zig-zag shape would be made up of 5 columns of wedges: the left-most pointy bit, the main bit on the left, the middle bit, the main bit on the right, and the right-most pointy bit. Does that make sense? Maybe I’ll have to try making it so I can post pics to show you what I mean!
Sunday sketch #275
Perhaps I stared too long at a clock this week, but I suddenly had an idea for a block featuring a circle cut in half and half again. (Or maybe I was inspired by last week’s split quarter-square triangle block.)

I imagined using some bright colours in the design, but instead settled on this dark green with an orange. I love the bright pop of colour against the murky background.
You can see if I rotate the circles, new secondary designs (squares) appear.


Or I can rotate the designs to create ’empty’ squares where the filled squares were.

Or just rotate randomly to create a bit of disorder. (Although if you look closely, you’ll see there is order here: the first and third rows are the same, as are the second and fourth rows. This makes each quadrant of 4 circles the same, too.)

This is just a single block in a 4 x 4 layout, surrounded by a wide border on all sides. It could be created in four quadrants, or perhaps one semicircle and two quadrants. There are lots more ways you can rotate the blocks, or use colour to create secondary designs. Endless fun!
