Tagged: paper piecing
Sunday sketch #276
I revisited wedges recently (after first playing with them around 2 years ago – see Sunday sketches #219, #220 and #221). This isn’t the first design I made (keep reading to see that one), but it does use the first block I came up with.
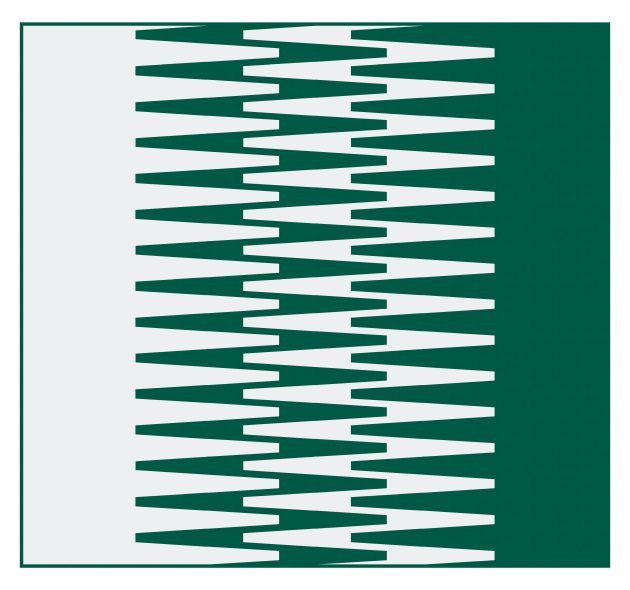
I really like those two vertical columns in the middle of the design where the points of the wedges meet, so I pared the colour palette back to emphasise them: white on the left, green on the right. Are these green shapes on a white background, or white shapes on a green background?

I like the portrait-orientation layout too, although the landscape version still appeals more for some reason.
But anywhere, here’s where it started – the same block, with the wedges lying horizontally, but using a slightly larger colour palette.
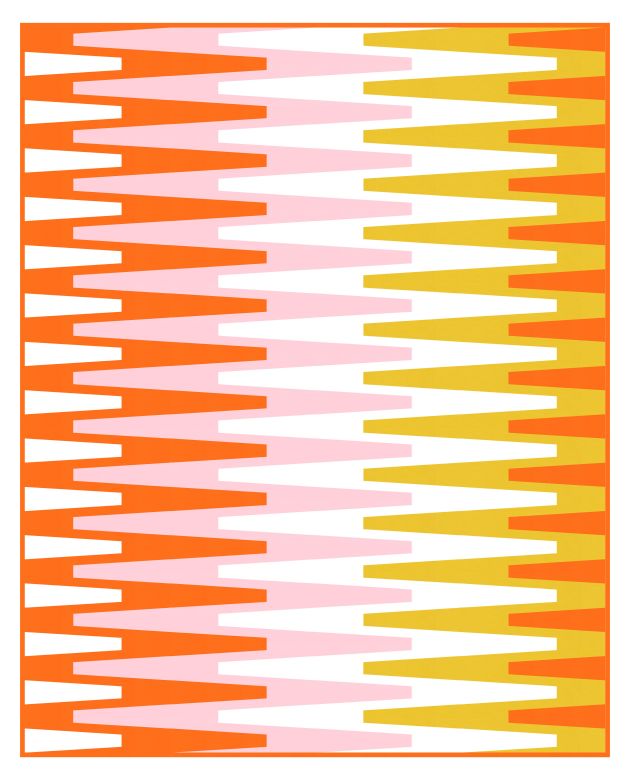
This feels a bit more mid-century modern, maybe. I love how the wedges nest into each other; the colours can play quite differently with one another depending on where they’re placed.

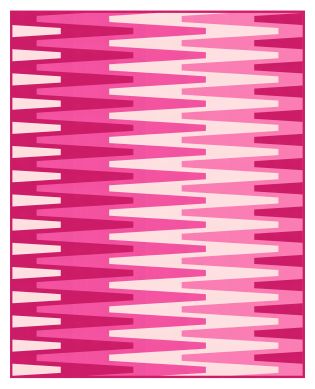
In the version on the left, that white zig-zag shape sinks into the background, whereas the same shape in the version on the left (in light pink) comes to the foreground.
Often how I draw a block in ElectricQuilt 8 is not how I’d actually make it in fabric – I usually draw in the way that gets the idea from my brain onto the screen most quickly or that’s easiest to colour in quickly. But that can mean that shapes are cut off in weird ways or there are seams in weird places… or that the block wouldn’t use fabric in the most straightforward or economical way.
So even though these last few designs are a 4 x 5 block layout, I wouldn’t make them this way (it would mean a lot of paper-piecing with a bunch of different templates per block, and lots of seams within each wedge). Instead, I’d paper-piece vertical columns (9, in this case) of horizontal wedges, then match them up. Each zig-zag shape would be made up of 5 columns of wedges: the left-most pointy bit, the main bit on the left, the middle bit, the main bit on the right, and the right-most pointy bit. Does that make sense? Maybe I’ll have to try making it so I can post pics to show you what I mean!
Sunday sketch #273
This week’s design is a few steps further on from Sunday sketch #272 – you can probably see the same wedge shapes around the outside of each block, but the inside is now a cross shape that connects some of the wedges on opposite sides.
In the first version, I’ve used 2 colours + white in each block, against a dark blue background.

I used sashing to separate the blocks, but here’s the same design without sashing. It’s pretty energetic; probably a bit too energetic for me.

I find that using a common colour for the centre crosses helps to reduce the chaos a bit.


Or you can dial back the number of colours. Here I’ve used 2 shades of the same colour in each block. It instantly feels a bit calmer (the cool palette probably helps too).

Or even 2 shades of one colour across the whole design – again with the white centre crosses and the dark background and sashing.

It even works as a two-colour design – with the blocks in either an alternating colourway…


…or the same colourway.

(Doesn’t it feel like one of those folded paper cutouts? I wonder if you could recreate this design with a single sheet of paper and a pair of scissors….)

Like last week’s designs, this one would probably require paper-piecing (foundation or freezer paper) to get the wedges just right. The centre square of each block could be pieced normally (with some strips and squares), but the wedgy sides and corners would benefit from some paper-piecing and/or templates.
Sunday sketch #272
I recently saw a pic on Instagram that totally inspired me: Jenn McMillan added wedges to a log cabin quilt. I immediately jumped into EQ8 to play with wedges. Here’s what I came up with!

And here it is in my go-to happy palette: pink, orange and yellow! I can never resist.

It’s possible to remove the sashing, of course. I like the new shapes that emerge when there’s no sashing – like the octagons at the vertices between the blocks, and the hourglass shapes that join adjacent blocks.
The sashing does give you somewhere to rest your eye though, which is maybe needed? I think I prefer the version with sashing, but the non-sashing version definitely draws me in too. I can’t decide!

If you’ve followed me for any length of time, you probably know that one of the hardest parts of designing for me is choosing a colour palette. I often use the same palette (pink, orange, yellow!) or limit myself to 3–4 colours.
Often, the number of colours is dictated by the number of elements in the block. The block in this week’s designs has 4 elements, which I’ve coloured in grey here so you can see them:

So for this design, I chose a palette of 4 colours (well, 3 plus white). And then I set myself a rule: in each row and each column, each colour could be used only once for each element. Of course, this only works because I used a 4 x 4 layout (if I’d added a 5th row or column, I would’ve had to repeat a particular element/colour combo at least once).
So – can you see how I’ve followed this rule in the versions below? Pick an element and a colour and check if it appears more than once in any column or row. For example, in the next version, look at the inner stars – how many green ones can you see? And where are they? What about white ones? Or yellow ones? Or blue? Do the same for the other 3 elements. They’re all distributed evenly across the whole design. It’s like some kind of Sudoku for quilt design haha.

It takes awhile to be able to balance colours and elements in this way, but it always makes me inordinately happy when I manage it. It also means that in this 4 x 4 layout, all 16 blocks are coloured differently. There are no repeats. (Really! You can check!)
If you remember permutations in maths, you’ll know that 4 colours can be ordered in 24 ways (4 x 3 x 2 x 1; that’s assuming you don’t want adjacent elements to have the same colour), which means there are another 8 unique block colourings that we could use in this quilt. Adding them would break my rule of not repeating the colours of certain elements in a single row or column, but we can’t have everything 🙂
Here are a few other colour combos. Changing where the lightest/darkest colours appear also changes the overall look a little bit.


I think this design reminds me a little of crocheted granny squares. I’ve never done crochet, but my mum made loads of crocheted blankets when I was a kid. I wish I still had one of them!
To make this design into a quilt, you’d probably need to use paper piecing to get the wedge shapes. Otherwise, you’d have to create templates to cut pieces precisely for standard piecing. I really love this design, so I’m very tempted to create my own freezer paper piecing templates to give it a go. I’ll post pics to Instagram if I do!
